Deb's Kitchen - Farm, Food, Wine & Lifestyle Adventures
  • Facebook
  • Google
  • Twitter
  • Instagram
  • Pinterest
  • Email
Menu
Skip to content
  • Home
  • Blog
  • Events
    • Classes
    • Tours & Adventures
  • Edible Gardening
  • Preserving
  • Recipes
    • Appetizers
    • Soups and Salads
    • Main Dishes
    • Side Dishes
    • Desserts
  • About
    • Whats In Your Pantry
    • Ask Debbi
    • Deb’s Kitchen Botanicals
    • Press
  • Contact

Tag Archives: cooking with herbs

New Cooking Class Venue

1 / 11 / 17

Cooking at Fullerton Arboretum

New Events!

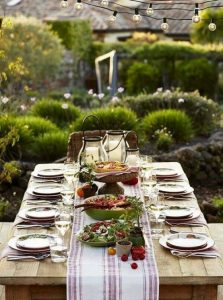
outdoor-table-setting 

Celebrating the seasons around the table with demonstration style cooking class and a specialty food tasting each month.

Join my friend Chef Louise Mellor and I in the beautiful gardens at Cal State Fullerton’s Arboretum for a meal as we celebrate the seasons.  Learn how to stock your pantry and together we’ll use garden fresh, seasonal ingredients with classic French techniques to create simple, exciting dishes for special occasions and everyday meals.

We will also be sharing how to entertain with simplicity and style.  Most importantly, we hope you will be inspired to get into the kitchen at home and share life around the table.

Full lunch servings will be offered and wine will be available if desired. Here are upcoming classes for Jan, Feb and March, take a look here for class registration and the schedule through summer! Hope to see you there~

Saturday, Jan. 21, 11 – 2
Book Signing and Demo

Soup from the pantry

Join us for a demonstration on soup basics and enjoy a hearty bowl of minestrone soup with puff pastry ‘rolls’.


February 11th, Saturday, 11 – 2
Cupid in the kitchen…
Chocolate Tasting

Roasted Spring Asparagus salad with Meyer Lemon vinaigrette

Elegant Beef Wellington Puff Pastry Tarts with Caramelized Onions, Maytag Blue Cheese, Sautéed Mushrooms

Dark chocolate hazelnut flourless cake with vanilla bean ice cream and fresh berries

March 25th Saturday, 11 – 2
I left my heart in San Francisco…
Olive oil tasting

Homemade herbed ricotta with lemon, Parmesan & blistered tomatoes served on sourdough crostini

San Franciscan style Cioppino with fresh seafood in a rich tomato white wine broth.

Blood orange olive oil cake with whipped Grand Manier marscapone


Leave a comment
Share
  • Pin it
  • Share
  • Tweet
  • Share
  • Email

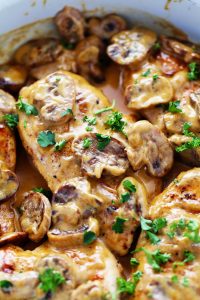
Chicken Marsala for a Quick, Easy Weeknight Dinner

1 / 10 / 171 / 11 / 17

chicken-marsala


Chicken Marsala

Save
Print

There is a simple trick that you can do ahead of time to make life a little easier cooking during the week. Buy chicken cutlets*, place them between 2 sheets of plastic or parchment paper and pound to ¼” thickness. Stack them with parchment paper between each breast, freeze on a sheet pan separately then wrap in plastic and place the entire stack into a freezer bag. Now you can remove 1 or 2 or 4 when you get home from work and proceed with any recipe. The chicken breast (you can do this with pork tenderloin as well), will defrost almost immediately and you’ll have dinner on the table in ½ hour.

  • 1/3 cup flour plus more for mushrooms
  • Sea salt and pepper, to taste
  • Olive oil
  • 4 Chicken cutlets, pounded ¼” thick
  • 1 tablespoon unsalted butter
  • 6 ounces brown crimini mushrooms, sliced or quartered
  • 1 ½ tablespoon minced shallot
  • 2 teaspoons minced garlic
  • 1⁄2 cup chicken stock
  • 1⁄3 cup dry Marsala wine
  • 1 tablespoon lemon juice
  • 1 tablespoon lemon zest
  • 1 tablespoon Italian flat leafed parsley, minced

Season the flour with sea salt and pepper and dredge the chicken in the flour shaking off the excess.

Heat the slow cooker to sauté if you can or use a skillet, add enough oil to coat the bottom of the pan and lightly brown the chicken on both sides. Set aside.

If needed add a little more oil to the pan, just enough to coat the bottom and add the butter, when melted sauté the mushrooms until browned. Add the shallots and cook until translucent, add the garlic and stir briefly until it’s aromatic.

To finish on stove top:

Sprinkle the mushroom mixture with a little flour and cook, stirring until flour is incorporated and browned. Whisk in the chicken stock, Marsala wine and lemon juice, reduce until slightly thickened. Add the chicken back to the mixture and cook for about 2 minutes. Serve with chopped parsley and lemon zest over the chicken breasts.

*If you want to buy chicken breasts or cut from a whole chicken just butterfly them before pounding.

Leave a comment
Share
  • Pin it
  • Share
  • Tweet
  • Share
  • Email

Christmas Roast

12 / 6 / 16

A Christmas Roast, Dec. 2016
rib-roast

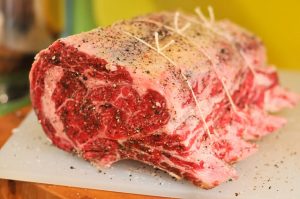
After the huge cooking spree for Thanksgiving I’m happy to create a simple elegant meal for Christmas and I always turn to a rib roast. Most people refer to them as a ‘prime rib’ yet that really refers to the grade of meat. While USDA Prime Grade is the best, it can also be on the expensive side, while a good ‘Choice’ grade is nearly as good as the prime, it can be purchased for much less. Both roasts are considered ‘standing rib roast’ and you treat them equally in cooking.

Costco has the absolute best deal on both Choice and Prime Grade roasts, choose bone in for the best flavor and juiciness. Either roast will need to cook a little longer with the bone in but the flavor is superior. A trick you can do is cut the bones off the roast and tie them back onto the roast, you’ll still get juicy flavor but won’t need to roast quite as long.

The roast will take some time to come to room temperature so remove from the refrigerator 3 house before roasting. Pre heat your oven for 30 minutes and roast for approximately 15 – 20 minutes per pound, start with a high heat, 450°, for 15 minutes, then turn the oven down to 325° and continue cooking. Use a digital probe thermometer for best results, it’s worth spending $15 or $20 on a digital thermometer for a $75.00 roast.

For rare roast remove from the oven when the thermometer reaches 120°, for medium rare, 125° or 130° for medium, the meat will continue to cook (called carry over cooking time) while it rests. I like to serve the roast with a Red Wine Sauce or Bordelaise Sauce but remember that your sauce will only be as good as the beef stock you use so use the best. Homemade is tops but if you must purchase a stock try More Than Gourmet Glace de Veau (veal stock). Standing rib roasts are great on the grill also but that’s another story.


Photo: Josh, The Meatwave

Prime Rib or Standing Rib Roast

Save
Print

Serves 8
Total preparation time: 1 hr. 30 min. – 2 hr.

  • 1 (7 lb.) Rib Roast, Bone-In or Boned & Tied
  • 2 tablespoons unsalted butter
  • 1 clove garlic, minced – optional use 1 teaspoon ground garlic (NOT garlic salt)
  • Sea Salt and ground pepper

Place roast in a shallow baking pan bone down, melt butter in small saucepan and add garlic and salt and pepper. Mix well, brush over roast, and let stand at room temperature for 2 hours.

Preheat oven to 450°F. Use a probe meat thermometer*, placed into the center of the roast but not touching bone. Roast for 10 minutes in uncovered pan, then reduce heat to 350°F and continue for 1 hour and 20 minutes for rare. Baste with pan drippings from time to time. Thermometer should read 120° - 125° for rare, 130° - 135° for medium rare. Do not cook beyond 140°, medium. Let the roast stand for 15 minutes, with the probe in the meat, before slicing. Slice either between the bones or cut off all the bones at once and the slice the meat into serving pieces.

Roast 15 minutes more if you want a medium roast, another 15 minutes for well done.

Remove from oven when done, and allow the meat to rest for a few minutes before carving. Transfer to a warmed serving platter.

• A digital probe meat thermometer – the probe remains in the meat while in the oven and the control sits outside on the stove or counter. See link below

Bordelaise Sauce

Save
Print
  • 3 tablespoons butter
  • 1 onion, chopped
  • 2 carrots, sliced in rounds
  • 2 cloves garlic, cut in half
  • 4 peppercorns
  • 1 bay leaf
  • 11/4 cups beef broth*
  • 1 sprig thyme
  • Sea Salt
  • 2 tablespoons flour
  • 1/2 cup dry red wine
  • 1 tablespoon Italian flat leaf parsley, chopped

Melt the butter in a heavy skillet and sauté the onion until transparent. Add the carrots and cook until soft.

Place garlic, peppercorns, and bay leaf in cheesecloth bag. Add to pan along with 1 cup of beef broth. Boil until broth has been slightly reduced, about 10 minutes, then season with thyme and salt.

Remove cheesecloth bag and put mixture through a coarse strainer. Return to pan.

Meanwhile, dissolve flour in the other 1/4 cup of broth and add gradually to sauce. Stir constantly until sauce thickens, then add the wine. Reduce heat and allow to simmer until ready to serve, and then sprinkle chopped parsley on top.

Use a quality beef broth if not making your own such as More Than Gourmet Glace de Veau (veal stock).
Leave a comment
Share
  • Pin it
  • Share
  • Tweet
  • Share
  • Email

Easy Thanksgiving Shortcuts

11 / 16 / 16

How to Make Stock & Gravy for the Holidays

These are two great project to make this weekend and freeze for your holiday next week. You don’t need to wait until the turkey is cooked before making your gravy. You can make the stock in a slow cooker, much hands off and you don’t need to precisely cut the vegetables since you will discard them after the stock is made. 
This time of year all grocery stores, especially the high end ones, Whole Foods, Gelsons, Lazy Acres, Bristol Farms will carry turkey and chicken pieces for your stock. You can mix chicken parts with the turkey and you won’t notice a difference.

Even if you say you don’t want ‘pre-made’ gravy and want to wait until your bird is done, make the roux (flour and fat which thickens the gravy) ahead of time and refrigerate. Cut up the vegetables for the stock, put them in a freezer bag and pop in the freezer until you make the actual stock. There’s enough to do at the last minute! I know many of you will balk at not stuffing your bird but it’s very dangerous and takes so much longer to cook that the turkey is usually overdone. If you insist that the dressing tastes better there are a couple of ways you can accomplish more ‘turkey’ flavor in the dressing. One, use turkey stock to make the dressing/stuffing and mince some turkey parts to mix in with the dressing. You can buy gizzards, hearts etc. and use them to make stock then mince and add to the dressing. Here’s a really great trick to cut down on time in the kitchen….Cut your turkey into pieces instead of cooking a huge unwieldy bird. Add the dressing to the pan with the turkey 30 minutes before it’s due to come out of the oven and you’ll have that ‘cooked in turkey’ taste. The turkey not only cooks faster, it’s easier to serve, easier to carve and the clean up is next to nothing. You won’t have that carcass that you try and cover and stick in the overcrowded refrigerator and you will have a perfectly cooked bird as you can now remove the breast pieces from the oven when they are done rather than take the chance the breast will be overdone before the legs/thighs are cooked. 

So those are my simple tricks to make Thanksgiving an easier meal to cook. Get started with these two short video’s and get cookin’ this weekend! 

Happy Thanksgiving to you all!

Here are a couple of video’s that I made with my friend, Christina Peters from
Food Photography Blog


Leave a comment
Share
  • Pin it
  • Share
  • Tweet
  • Share
  • Email

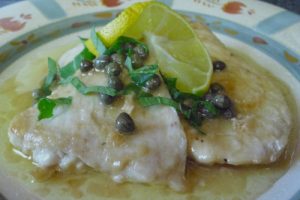
Chicken Piccata

11 / 7 / 16

An easy weeknight recipe, especially if you make the actual chicken cutlets ahead of time and freeze. Take them out of the freezer and place in the refrigerator before you head out for the day. When you’re ready for dinner (or lunch) you can finish the dish in less than 15 minutes, cover some pasta in a microwave dish and cook while the chicken cooks, add a little salad with some freshly grated parmesan cheese and seasonal vegetables for a quick, healthy tasty meal!

chicken-piccata

Chicken Piccata

Save
Print

Serves 4

  • 2 skinless, boneless chicken breasts, (1 whole breast) cut in half (through the middle, as if butterflying)
  • Sea salt and freshly ground black pepper
  • All-purpose flour, for dredging
  • 6 tablespoons unsalted butter
  • 5 tablespoons extra-virgin olive oil
  • 1/3 cup fresh lemon juice
  • 1/2 cup chicken stock
  • 1/4 cup brined capers, rinsed
  • 1/3 cup Italian parsley, chopped

Place chicken into a freezer type bag and pound with a flat meat tenderizer to about 1/4" thick. Season chicken with salt and pepper. Dredge chicken in flour and shake off excess.

In a large skillet over medium high heat, melt 2 tablespoons of butter with 3 tablespoons olive oil. When butter has melted, add chicken without crowding, you'll probably need to do this in two batches, and cook until lightly browned. Turn and lightly brown the other side, transfer to plate.

Add more butter and oil, as needed, if you are sautéing in two batches.

Add the lemon juice, stock and capers to the hot pan and bring to boil, scraping up brown bits from the pan, the 'fond'. Taste and season, if necessary. Return all the chicken to the pan, including any liquid that has gathered on the plate, and simmer for 5 minutes. Remove chicken to platter. Add remaining 2 tablespoons butter to sauce and whisk vigorously. Pour sauce over chicken and garnish with parsley.

www.debskitchen.com

[email protected]

Leave a comment
Share
  • Pin it
  • Share
  • Tweet
  • Share
  • Email

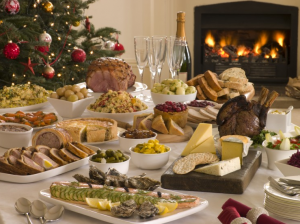
Holiday Appeteaser Party

11 / 4 / 16

Last Cooking Demo of the Year! Come and enjoy some tasty holiday party treats with us and we’ll send you off with some delicious, easy recipes for the season.

Thurs, Dec 8th
6:30 – 8:30, approximately
 

The Holiday Appeteaser Party

holiday-buffet
Smoked Salmon Mousse Coins with Roasted Red PepperSauce
Shrimp Cocktail Butter Lettuce Cups
Smoked Trout Crostini
Tuscan Lemon Chicken Speidini
Mini Hasselback Potato Bites
Chocolate Peppermint Truffles

By Reservation Only
(562) 296-5421
148 Main Street
Seal Beach, CA 90740

Sponsored by

Leave a comment
Share
  • Pin it
  • Share
  • Tweet
  • Share
  • Email

Holiday Cooking

11 / 4 / 16

November Cooking Demo’s

Don’t miss out! These are some of the last classes of the year. All based around holiday cooking, join us to learn tips & tricks on how to get through the season deliciously!

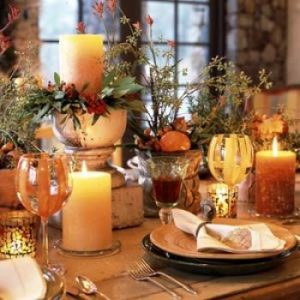
fall-table-stackedinteriors

Thurs, Nov. 10th
6:30 – 8:30, approximately

Reserve your spot today!

Temecula Olive Oil Tasting Room, Seal Beach

Apple, Goat Cheese & Sage Tart
Duck Breast with Balsamic Jus
Pan Roasted Brussels Sprouts with Bacon & Pomegranate Seeds
Pear Cranberry Crisp  

Thurs., Nov. 17th
6:30 – 8:30, approximately

Fruit & Cheese Plates
Roasted Chicken with Chestnuts & Shallots
Learn how to cut up a whole chicken!
Fresh Sage, Apple & Brioche Dressing with Pancetta
Cranberry Frisee Salad
Salted Caramel Apple Cake

By Reservation Only
(562) 296-5421
148 Main Street
Seal Beach, CA 90740

Sponsored by

Leave a comment
Share
  • Pin it
  • Share
  • Tweet
  • Share
  • Email

10 must have pantry items for the holidays

11 / 4 / 1611 / 4 / 16

10 must have pantry items for the holidays

herbsspices-411nutrition

Basic Pantry

  1. Organic Chicken Stock
  2. Unsalted butter and a variety of oils (Olive Oil, Peanut, Vegetable & Grapeseed)
  3. Organic Large Eggs
  4. Organic Milk and Cream (for whipping and cooking)
  5. Variety of cheeses, for cooking and serving as appetizers or dessert
  6. Variety of potatoes, Russet for baked or mashed, Fingerlings or Yukon Gold for roasting
  7. Day old breads for breadcrumbs and stuffing or dressing. Freeze for later use. Crackers
  8. Celery, Carrots and Onions, Fresh Citrus
  9. Fresh Sage, Italian Parsley and other herbs
  10. Fresh and Dried Mushrooms

Book Cover

Buy my book ‘What’s In Your Pantry’ for more tips & tricks in the kitchen!


Baking

Beyond the basics, flour, white, brown and powdered sugars, baking soda, baking powder and vanilla.

  1. Nuts
  2. Chocolate
  3. Cocoa Powder
  4. Cinnamon or Baking Spice, Allspice, Nutmeg
  5. Dried Fruits
  6. Variety of jam for easy to make desserts
  7. Peppermint and dried fruit candies
  8. Cream of tartar
  9. Parchment paper
  10. Caramels and Toffee

Make Ahead for the Freezer

  1. Pie Dough
  2. Cookie Dough
  3. Puff Pastry (buy an all butter pastry-read the label)
  4. Gravy
  5. Easy bake appetizers, Empanadas, Pot Stickers, Crab Cakes, Cheese Balls
  6. Meatballs, basic recipe use different sauces for quick appetizers
  7. Quickbreads
  8. Casseroles
  9. Breakfast Treats, Cinnamon Rolls, Scones,
  10. Frozen Seafood, Shrimp, Scallops, Lobster
Leave a comment
Share
  • Pin it
  • Share
  • Tweet
  • Share
  • Email

October Cooking Demo

10 / 26 / 1610 / 27 / 16

Join us in Seal Beach

Thursday October 13th 6:30 – 8:30, approximately

Repeat Class Thur, Oct 27th!

Boursin Cheese Dip with Roasted Grapes Crostini’s

Apple, Parmesan and Walnut Salad with  White Balsamic Apple Vinaigrette

Fall is the time when I start thinking about casseroles and slow cookers, here’s the first casserole of the fall!  

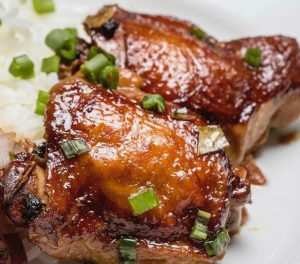
Balsamic Chicken & Pork Riblettes

served with Roasted Red Bell Peppers, Green Onions and Fresh Lemon Olive Rice Pilaf

Orange Olive Oil Chocolate Pumpkin Cupcakes 

Temecula Olive Oil Tasting Room, Seal Beach

Call Now for reservations
562-296-5421

Sponsored by

 Melissas logo small

Leave a comment
Share
  • Pin it
  • Share
  • Tweet
  • Share
  • Email

September Cooking Demo

8 / 4 / 16

Join us in Seal Beach

Thursday September 15th 6:30 – 8:30

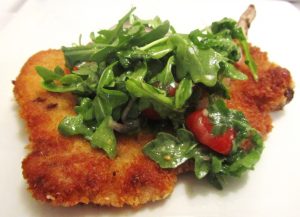
Pork Milanese Michael Symon

Oven Dried Tomato Crostata with Fresh Ricotta

Hearts of Romaine Salad with Fresh Grated Parmigiano-Reggiano

Pork Milanese with Meyer Lemon & Chopped Tomato ‘Salsa’

Cheese Tortellini Alfredo with Broccoli Rabe

Peach Amaretti Crisp

DKB-12

Temecula Olive Oil Tasting Room

Seal Beach

Call Now for reservations
562-296-5421

Sponsored by

Melissas logo small

Leave a comment
Share
  • Pin it
  • Share
  • Tweet
  • Share
  • Email

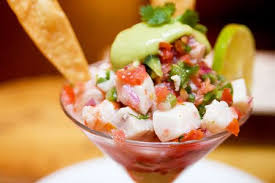
Ceviche with Avocado and Tomato Broth

7 / 20 / 167 / 20 / 16


ceviche tomato


Ceviche with Avocado and Tomato Broth

Save
Print
  • 1 pound white fish halibut, red snapper, sole,
  • 2 teaspoons mild or hot pepper
  • 2 tablespoons cilantro, minced
  • 1 tablespoon shallot, minced
  • 1 large rib celery, cut into a small dice
  • 1 medium tomato, cut into the same size as the fish, squeeze out the seeds
  • 1/2 cup freshly squeezed lime juice, or enough to cover ingredients
  • 1 splash olive oil
  • Tomato Broth
  • 1 slice white bread
  • 1 can whole tomatoes, with juice
  • 1 cucumber, peeled, rough chopped
  • 1 small shallot, rough chopped
  • 1 cup tomato juice
  • 1 tablespoon red wine vinegar
  • 1 tablespoon olive oil
  • 1 pinch garlic powder
  • Salt and pepper
  • 1 pinch sugar
  • 2 Haas avocadoes, peeled, cut in half, pit removed
  • 1 lemon or lime zested
  • cilantro sprigs, for garnish

Ceviche:

Chop the white fish into small dice, add to a mixing bowl and set aside.

Clean the pepper of stems, seeds and ribs and mince into a fine dice. You may want to wear glove to do this.

Mix all ingredients together well; making sure it’s all covered by the lime juice and olive oil. Refrigerate for at least 3 hours.

Tomato Broth:

Place the bread into the bowl of a food processor and process until you have coarse crumbs. Add remaining ingredient and process until pureed. Chill for 30 minutes before serving.

Ladle some tomato broth into a cup or bowl. Place avocado into center of bowl, place ceviche into the center and top with lemon zest and a sprig of cilantro.


Leave a comment
Share
  • Pin it
  • Share
  • Tweet
  • Share
  • Email

Grilled Pizza

7 / 6 / 167 / 6 / 16

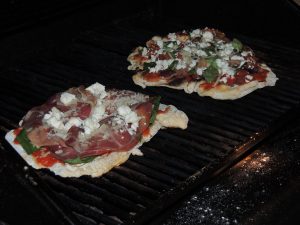
Pizza on the grill 1

I love pizza on the grill! The first time I cooked pizza on the grill I was worried the dough would slip through the grates but it doesn’t! The grill is a perfect tool for a backyard dinner, the house stays nice and cool and you can relax with a cold drink while your pizza cooks. First you have to heat your grill to it’s hottest! Pizza likes a good 500° – 600° oven to produce a great crust.

Buy or make your crust in the morning so it’s ready to go when you are. Prep your ingredients ahead of time. Grate or slice the cheese, pepperoni or salami, slice the mushrooms (store in a small bowl with a slightly damp paper towel over them), cut or tear your herbs such as basil, thyme and/or make a pesto for your pizza. Be creative and be organized.

Once your grill is at its hottest, roll out your dough on a lightly floured surface (or if you’re into hands on-flour your hands and stretch the dough out into any shape you like). Put your dough on a pizza peel that has been lightly dusted with flour or cornmeal, make sure the dough slides around on the peel so that when you put it on the grill it will slide off easily.

Brush your grill with oil and slide the dough onto that spot. Turn down the burners if you’re using a gas grill.* Grill for 2-3 minutes or until lightly charred. Turn your pizza over, brush the cooked side with a little olive oil if you like, add your sauce and any of the toppings you’ve chosen. Close the grill lid and let the pizza cook until the bottom is nicely charred and your toppings have melted and cooked. Remove from the grill with the pizza peel, let sit for a minute or two before slicing. Enjoy with a cold beer and tossed salad! That’s how to beat the heat at my house. Have a great summer!

*If using a grill with charcoal or wood you’ll want to make a direct heat side and an indirect heat side. You’ll be cooking the pizza on the indirect side.

Here’s the recipe

No Knead Pizza Dough

Save
Print

This is Jim Lahey’s no knead recipe for pizza dough, it’s easy and so much better than store bough pizza dough. The hardest part is to remember to make it ahead of time. You can store the dough up to 3 days in the refrigerator so it’s easy to plan ahead. This recipe makes 4 balls of dough (4 pizza’s). Jim likes to weigh all the ingredients and in reality you do get a much better and more consistent product but if you insist on measuring, I’ve included his instructions for that also.

  • 500 grams all-purpose flour, 17 ½ ounces or 3 ¾ cup, plus a little extra for shaping
  • 1 gram active dry yeast, ¼ teaspoon
  • 16 grams fine sea salt, 2 teaspoons
  • 350 grams water, 1 ½ cups

In a medium bowl, thoroughly blend the flour, yeast, and salt. Add the water and, with a wooden spoon or your hands, mix thoroughly.

Cover the bowl with plastic wrap or a kitchen towel and allow it to rise at room temperature for 18 hours or until more than doubled. It will take longer in a cook room and less time in a warm one.

Flour a work surface and scrape the dough out of the bowl, divide into 4 equal parts and shape them.

For each portion, start with the right side of the dough and pull it toward the center, then do the same with the left, then the top, then the bottom. (The order doesn't actually matter; what you want is four folds.) Shape each portion into a round and turn seam side down. Mold the dough into a neat circular mound. The mounds should not be sticky; if they are, dust with more flour.

If you don't intend to use the dough right away, wrap the balls individually in plastic and refrigerate for up to 3 days. Return to room temperature by leaving them out on the counter, covered in a damp cloth, for 2 to 3 hours before needed.

Related Posts Plugin for WordPress, Blogger...
Leave a comment
Share
  • Pin it
  • Share
  • Tweet
  • Share
  • Email

Posts navigation

Previous Page 1 2 3 4 5 6 7 … 9 10 Next Page
Deb

Meet Chef Debbi

READ BIO

Join-Us Sign up for our newsletter to receive exclusive tips 'n tricks, and special offers on classes, tours, and more!

Recent Posts

  • New E-Book!
  • From the Pantry
  • Spaghettini at Home
  • Growing Corn
  • Spring IS Coming!

Categories

BookCUT

What's in Your Pantry?

How to stock your pantry to create delicious dishes.

Learn Chef Debbi's pantry essentials and how to substitute ingredients for pantry staples in her basic recipes for quick and easy meals.
BUY BOOK>

FacebookTwitterInstagramGooglepinterest


© 2014, DEB'S KITCHEN
Angie Makes Feminine WordPress Themes