Seal Beach tasting room
June 23rd
Thur, 6:30 – 8:30
Tuscan Al Fresco Dinner
Artichoke Pesto Bruschetta
Tuscan Summer Salad Gigante White Beans with Roasted Red Bell Peppers
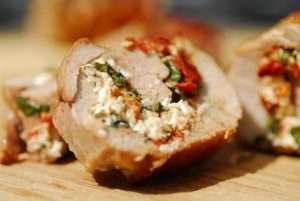
Pork Tenderloin Stuffed with Sundried Tomatoes, Goat Cheese, Basil & Toasted Pine Nuts
Bucatini with Porcini Mushroom Sauce
Rustic Berry Tart
1 ½ - 2 cups freshly rendered pork lard (you can buy good-quality lard from a local butcher or Mexican market; I don't recommend the hydrogenated lard that's sold in bricks)
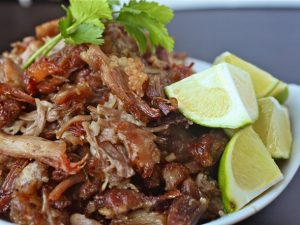
Cut the pork into 2 ½- to 3-inch pieces and sprinkle generously on all sides with salt. Scoop the lard into a 6-quart slow cooker and turn on high. When the lard is melted, fit in the pork in a single layer (there should be few gaps between the pieces and they should be barely covered with the fat). Cover and cook until thoroughly tender, about 3 hours. Turn off, uncover and let cool.
Remove the pork to a cutting board, leaving behind as much fat as possible. (You can refrigerate the lard to use for another round of carnitas, to season beans or fry potatoes or the like.) Shred the carnitas into very large, coarse pieces. Set a heavy skillet over medium heat. When the pan is very hot, spoon in enough carnitas-cooking fat to film the bottom generously. Scoop in the pork, spreading it out evenly over the bottom of the pan. Cook undisturbed for a couple of minutes, until it is richly browned and releases itself from the bottom of the pan. Gently turn the pieces to brown the other side. Remove to a plate lined with paper towels. Sprinkle with salt (coarse salt is welcome here, if you have it).
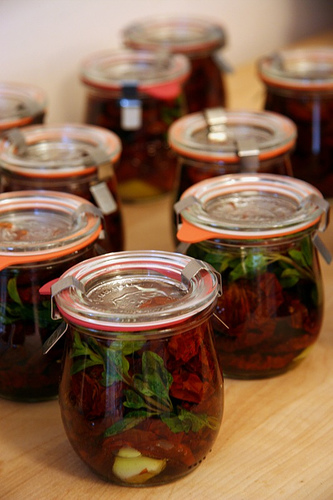
Is your garden overflowing with tomatoes? I always grow too many and one of my favorite ways to make them go a little farther is to oven dry them. Much like sun dried, these concentrated gems pack a powerful punch and can be used in any dish where you’d use tomatoes. Especially nice on a cheese plate with some creamy goat cheese nearby.
To preserve them I turn them into a tomato confit and keep in my ‘pantry’ refrigerator. They can’t be water bath canned because of the oil, but they will keep for about 6 months in the refrigerator, if they last that long. The refrigeration will also help to preserve the oil and keep it from going rancid quicker. Use only fresh organic herbs and make sure you wash and dry them very well, you don’t want any water going into your beautiful confit.
Arrange the tomato halves cut side up and close together on a baking sheet, season with salt and pepper.
In a bowl, combine olive oil, garlic, and herbs. Drizzle over tomatoes and bake until the tomatoes are soft and shriveled but still retain some moisture, 1-2 hours or more.
Let cool completely. Tomatoes can be stored in a glass jar, cover tomatoes with olive oil, add a fresh sprig of thyme, seal and refrigerate.
Place a steamer basket into a large pot, fill with water to just above steamer bed, bring to a boil while you prepare the artichokes.
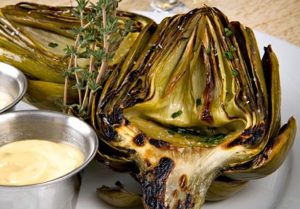
Cut about 1” – 2” off the top of the artichokes with a serrated knife. Trim the stem to the desired length. Pull off any of the smaller leaves near the bottom and take a pair of kitchen shears to cut the prickly edge off the remaining leaves. Cut the artichoke in half lengthwise, rub the artichoke with a cut lemon, add the lemon juice and rind to the pot of boiling water and place the artichokes in the steamer. Cook for 30 minutes, remove the artichokes and let cool. Remove the choke with a spoon and set the artichoke halves into a large bowl. Toss the artichokes with olive oil and season with a little sea salt and pepper.
Heat your grill to medium-high heat and grill artichokes until slightly charred, turning occasionally, about 8 minutes. Serve with Walt's Wharf dipping sauce.
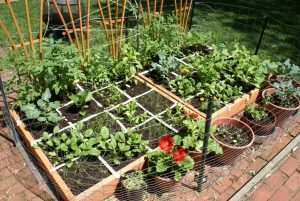
When I got my first community garden, the city had to run an ad to get people interested in gardening. That was 20 yrs ago, today we have a 3 year waiting list for available plots.
The first thing I did was research, which I love to do, on the best way to grow organic vegetables. The one book I kept going back to was ‘Square Foot Gardening’ by Mel Bartholomew, an engineer who redesigned the backyard garden in order to grow more vegetables in a smaller space. We all learned to garden from books and farmers who grew in large spaces on large farms, we don’t need to use their methods in our little backyards.
Mel’s design was basic, a 4 x 4’ raised bed with 6” sides (or taller) set upon landscape fabric to prevent weed or grass growth, other materials could also be used, then filled with equal portions of vermiculite, peat moss and compost and then divided into 16 one foot spaces. In each space Mel created a planting guide depending on the recommended space for each seed. Such as corn gets 1’ space to itself and so do tomatoes because they are large plants, smaller veggies can be planted 4, 16 or 18 to a square. We can help you understand that, we’ll be talking about Square Foot Gardening this Sat, May 14 at 10 a.m. at The Plant Stand in Costa Mesa.
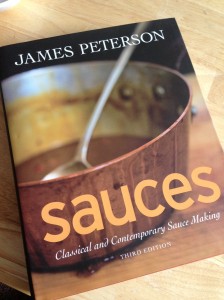
Here is the sauce class you have all been asking for!
All sauces are are variations of French Cuisine’s ‘Mother Sauces’. We’ll share the most basic sauces and their variations and how best to adapt them to easy everyday cooking.
Winter Green Salad with Apples, Cranberries & Walnuts
Pomegranate French Style Vinaigrette, Pomegranate Vinegar
Seared White Fish with Lemon Olive Oil Dill Sauce
With White Wine Poached Seasonal Vegetables, Lemon Olive Oil
Irish Mac & Cheese with Smoked Bacon Au Gratin, Hickory Smoked Olive Oil
Minted Shortcakes with Grand Marnier Strawberry Sauce, Orange Olive Oil
*Stir the flour with a table knife to lighten the flour; it becomes compacted as it rests. Dip your measuring cup into the flour and use the knife to sweep the excess flour off the top of the cup. According to King Arthur Flour it should weigh 4 ¼ ounces.
Dough recipe adapted from ‘Artisan Bread in 5 Minutes a Day’
Sauce recipe will yield 2 cups and hold for several days. Adapted from Sunset Magazine
1 ½ cups lukewarm water
1 packet granulated yeast, 2 ¼ teaspoons
½ teaspoon sea salt
3 ¼ cups King Arthur unbleached white flour, measured with the scoop and sweep method*
Sauce:
2 tablespoons olive oil
½ small onion, chopped
2 small cloves garlic, minced
1 pound fresh tomatoes, quartered or 1 lg. can whole or crushed tomatoes
1 small can tomato paste
2 teaspoons dried oregano
1 teaspoon dried thyme
1 granulated sugar or more as needed
2 tablespoons chopped fresh basil
Sea Salt and fresh pepper, to taste
Pinch crushed red pepper flakes (optional)
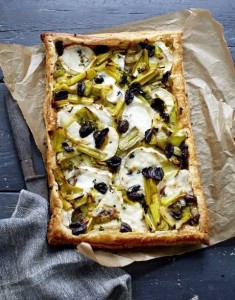
Pizza Margherita Topping
Sauce
Mozzarella, torn into pieces
Fresh basil, torn into pieces
Dough: (Make at least 1 day up to 5 days ahead of time)
The water should be warm to the touch but not more than 110°, and add the yeast to the water.
Add salt to the flour and whisk to distribute using a large bowl or a plastic food container with lid. Add the water to the flour all at once and mix with a wooden spoon or wet hands, the dough will be sticky. No kneading is necessary.
Loosely cover with lid and let stand at room temperature approximately 2 hrs. The dough can rise longer, up to 5 hours without affecting the results. The dough is easier to handle if you can make it the night before and refrigerate overnight.
Working on a lightly floured surface, pinch off a palm sized piece of dough, shape into a round, rectangular or square shape. Dough is sticky so keep some extra flour nearby, dust your hands as necessary to shape the dough. If the dough starts to snap back you should let it rest for a few minutes and then resume shaping. I use a rolling pin to thin the dough out to my desired style
Place onto parchment paper, a dusted pizza peel or the bottom of a dusted baking sheet. You can use anything you want providing the pizza can slip right off onto the rack.
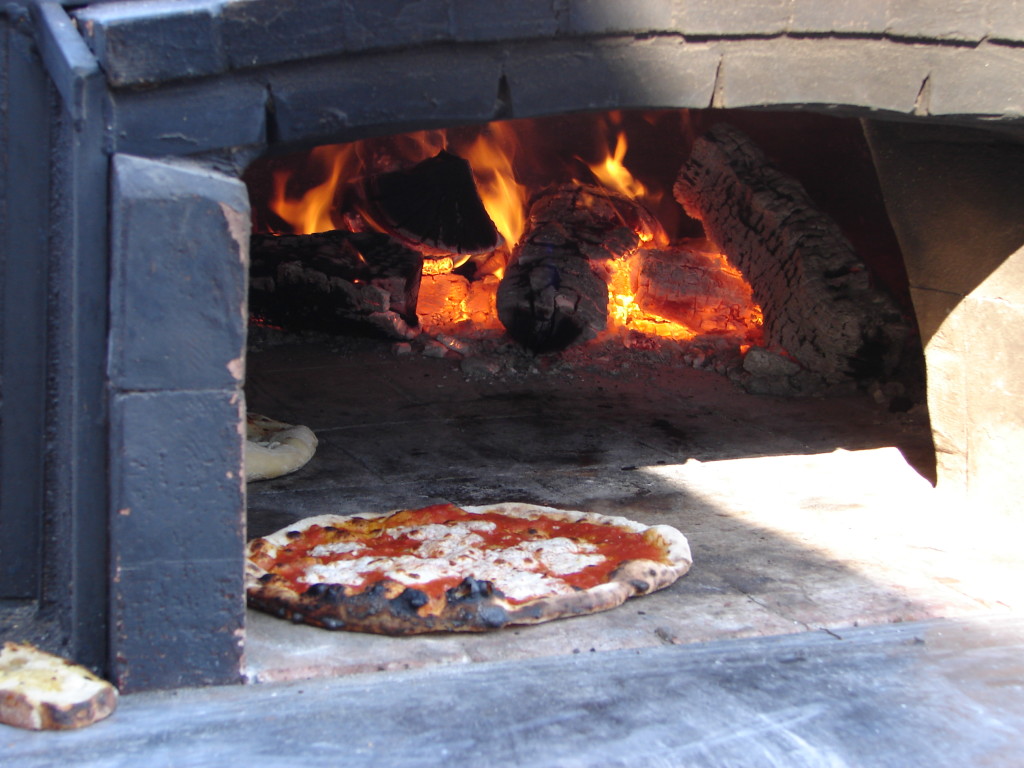
If you are baking in an oven, preheat your oven to 500° or as high as it will go. Top the dough with anything you like, slid it into the hot oven and bake for 12-14 minutes.
Sauce:
Heat a deep saucepan big enough to hold all the ingredients, add the oil and onions and sauté until translucent. Add the garlic and stir briefly.
Place all the ingredients along with the garlic and onions into a blender, or use an immersion blender and puree.
Ladle or spoon onto pizza dough leaving an clean edge around the outside of the dough. Sprinkle or place the cheese on top and bake on a hot pizza stone for about 6-8 minutes, checking frequently. Sprinkle with fresh basil and let rest for a minute or two before slicing. Mangia!