Deb's Kitchen - Farm, Food, Wine & Lifestyle Adventures
  • Facebook
  • Google
  • Twitter
  • Instagram
  • Pinterest
  • Email
Menu
Skip to content
  • Home
  • Blog
  • Events
    • Classes
    • Tours & Adventures
  • Edible Gardening
  • Preserving
  • Recipes
    • Appetizers
    • Soups and Salads
    • Main Dishes
    • Side Dishes
    • Desserts
  • About
    • Whats In Your Pantry
    • Ask Debbi
    • Deb’s Kitchen Botanicals
    • Press
  • Contact

Tag Archives: recipes

Champagne Grapes

7 / 28 / 15


GRAPES_Melissas


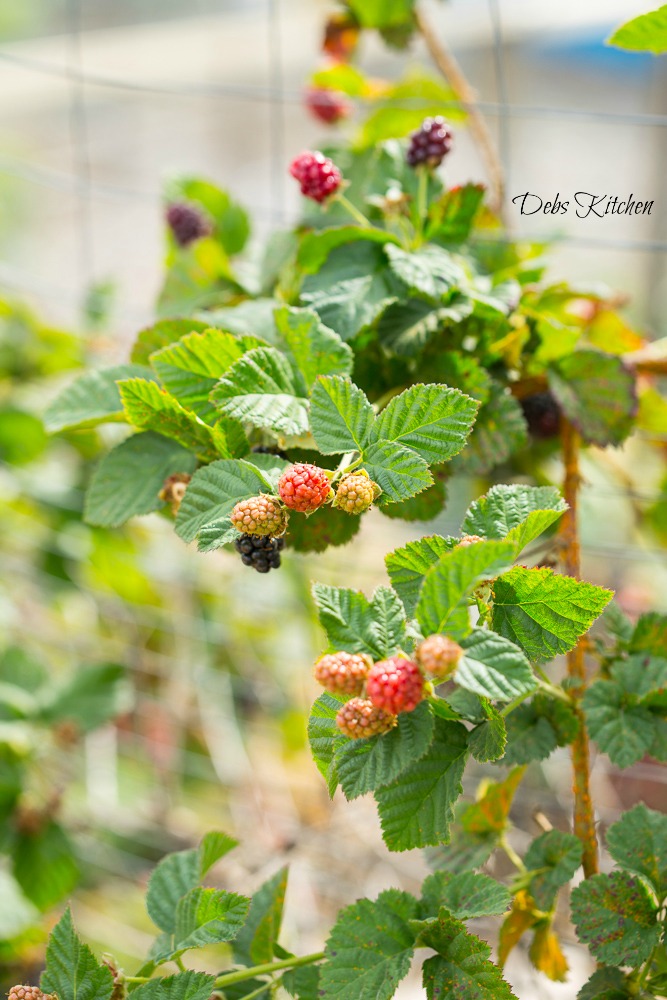
Champagne grapes are not the grapes that vintners make champagne with but are called such because they look like the little bubbles that float in a lovely glass of champagne.

Champagne grapes are rather a grape variety called ‘Corinth’, small, seedless little pops of pure grape juice are also used dried. As a dried grape they can be known as Zante currants or simply currants but are not true currants.

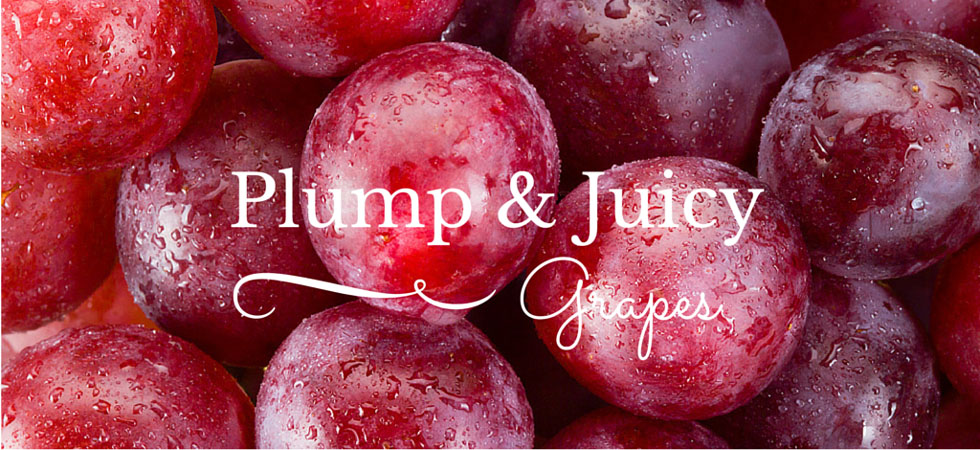
Look for dark grapes which indicates a state of ripeness and sweetness when shopping for Champagne grapes. Grapes that look wrinkled have passed their prime and won’t be as sweet. Store in the refrigerator and wash before use. Champagne grapes look elegant as a garnish to any dish and will sit perfectly well on a fruit and cheese platter but are easily versatile in cooking. Here is a wonderful recipe from our friends at Noble Pig Winery, originally adapted from Bon Appetit magazine.

Can’t find Champagne Grapes? Call click to find our friends at Melissa’s Produce and they will send some out to you right away!

Pan-Seared Scallops with Champagne Grapes and Almonds

Leave a comment
Share
  • Pin it
  • Share
  • Tweet
  • Share
  • Email

Brioche-Hurry Up & Wait

7 / 6 / 15

IMG_2507Homemade brioche is really pretty easy with most of the work being done by the dough. Plan ahead as it needs an overnight rise in the refrigerator. This recipe is from King Arthur Flour and they say (correctly I might add) that this recipe should be done only in a stand mixer. The dough is quite wet and sticky and it took 20 minutes to come together using my stand mixer. That was the hard part, well not really, the hard part was waiting overnight before I could bake it but the resulting French Toast was well worth the wait.

French Toast-BriocheAfter the overnight rise, I cut the dough in half and made 1 small loaf and 3 good sized buns (for burgers). Then you have to play the waiting game again for a few hours before you can bake them. The long overnight rise and the room temperature rise before baking results in a beautiful crumb and delicate taste. The aroma while baking, of course, will drive you wild. The bread turns a rich golden color (don’t be afraid to cover them while baking if they start to brown too quickly) and is a very soft, light bread when it’s finally ready for you to eat.

Brioche Baked

I’m going to freeze the buns for a future use and perhaps part of the bread for toast and French toast in the near future. I did make a test batch of French Toast with a little butter and real maple syrup and woofed it down. It would have been delightful with some summer fruit but the last of the farmers market fruit was eaten yesterday in a peach-blackberry cobbler.

This is great recipe to try over the weekend. Mangia!

Brioche

Save
Print

From King Arthur Flour:
The inspiration for this recipe comes from our bakery, where brioche buns are among the wide variety of rolls and buns King Arthur Flour bakers produce daily. These particular buns are rich, tender, and pillow-like, similar to our bakery’s, and are the perfect vessel for a big, juicy burger.

  • 2 3/4 cups King Arthur Unbleached All-Purpose Flour
  • ¼ cup Baker's Special Dry Milk or nonfat dry milk
  • 2 tablespoons sugar
  • 1 1/4 teaspoons salt
  • 1 tablespoon instant yeast
  • 3 large eggs + 1 large egg yolk, white reserved for wash (below)
  • 1/4 cup lukewarm water
  • 10 tablespoons unsalted butter
  • Egg Wash
  • 1 large egg white, lightly beaten with 1 tablespoon cold water
  • seeds of your choice, optional

Mix and knead the dough ingredients — in a mixer or bread machine — to make a smooth, shiny dough. It starts out sticky, and takes 15 to 20 minutes of kneading in a stand mixer to develop, so we don't recommend kneading this by hand.

Form the dough into a ball, place it in a greased bowl, cover, and let it rise for 1 hour.

Refrigerate the covered dough overnight, to slow its rise and make it easier to shape.

The next day, remove the dough from the refrigerator, and divide it into six pieces.

Shape each piece into a flattened ball, and place into the lightly greased cups of an individual pie and burger bun pan. Or place the buns on a lightly greased or parchment-lined baking sheet, leaving about 2" to 3" between them.

Cover the buns, and let them rise until they're quite puffy. This may take as little as 1 hour; or up to 2 to 3 hours, depending on how warm your rising environment, and how cold the dough. Towards the end of the rising time, preheat the oven to 375°F.

Brush the buns with egg wash, and bake on the middle rack of the oven for 14 to 18 minutes, tenting with foil after 10 minutes if they appear to be browning too quickly. The finished buns will register at least 190°F on a digital thermometer inserted into the center.

Remove the buns from the oven, and cool on a rack.

Yield: 6 buns or 2 small loaves

King Arthur Flour

Leave a comment
Share
  • Pin it
  • Share
  • Tweet
  • Share
  • Email

Summer Salads

6 / 29 / 156 / 29 / 15


Summer Nicoise

My summer pantry is usually a little lighter than my winter pantry as I use far more fresh ingredients, mostly from my kitchen garden. The French Nicoise Salad is one of my favorites and I like using whatever fresh veggies I find at the local farmers market or in my garden. As in most cases, the quality of ingredients that you use are directly reflected in the finished dish, therefore buy the best that you can afford. I use Italian tuna in olive oil; I love the Genova brand from Italy. Please don’t use all white tuna packed in water, as it has no flavor, better to leave it out. I drain most of the oil from the canned tuna, reserving it for use in making the salad dressing.

italiantuna_kalynskitchen

Another way to dress up the dish for a hot summer evening entree is to grill some fresh tuna or shrimp from your fishmonger. This recipe makes a beautifully plated salad for a buffet table but can be individually plated as well. Be creative and use what you have on hand.

Summer Nicoise Salad

Save
Print

This salad is great for adapting to whatever you find in your pantry and/or refrigerator. Left over vegetables from last night’s dinner work great; keep your pantry stocked with jars of olives, tuna, hearts of palm, baby corn or a myriad of other staples. Change the tuna; use bay shrimp, scallops, last nights chicken or steak. A great salad to stretch your creative talents!

  • Vinaigrette:
  • 1/4 cup red wine vinegar
  • 1 tablespoon Dijon mustard
  • 1 small shallot -- minced
  • 1 tablespoon Italian parsley -- chopped
  • Salt and pepper -- to taste
  • 3/4 cup olive oil, use drained oil from tuna and add more olive oil as needed
  • Salad:
  • 2 cans Italian tuna -- packed in olive oil, drained and flaked with a fork
  • Salt and pepper -- to taste
  • 1/4 pound haricot vert -- blanched, cooled and dried well
  • 4 new potatoes -- boiled
  • 2 medium plum tomatoes -- cut into quarters
  • 3 eggs, cooked~see recipe
  • 1/2 cup nicoise olives
  • 3 cups mixed baby greens

Make the vinaigrette:

In a large bowl make the vinaigrette by whisking together the vinegar and

Dijon mustard. Add shallot, parsley and salt and pepper. Drizzle olive oil, while whisking into vinegar mixture. Re-season if necessary.

Blanch the beans in boiling salted water, drain, and chill.

Cook the potatoes in salted water just until they are tender through, about 15 minutes. Drain. Peel them, if desired, as soon as they are cool enough to handle.

Hard boil eggs by covering eggs with cold water, bring to a boil, remove from heat, cover and time for 15 minutes, plunge into ice water and chill.

Drain tuna, leaving a small amount of oil clinging to fish, and reserving drained oil, flake tuna into a medium mixing bowl.

Toss mixed greens with enough vinaigrette to coat. Season with salt and pepper.

Plate salad by putting a mound of tuna in the center of the mixed greens and surround with remaining ingredients, drizzle a little dressing over vegetables and serve extra dressing on the side.

Save any remaining vinaigrette and store in glass jar, refrigerated for up to 4 weeks.

Leave a comment
Share
  • Pin it
  • Share
  • Tweet
  • Share
  • Email

Hawaiian Luau Feast

6 / 4 / 156 / 4 / 15

luau 002

Summer is almost here and if you can’t visit the Islands we can certainly take some of the traditional Hawaiian foods and tweak them to our recipes and summer picnics. Our next cooking class uses many of these ingredients and we show you ways to incorporate them into your backyard parties.

luau 001

While we can’t host a traditional luau in the tasting room we can enjoy a luau type picnic with foods of the Islands. In ancient Hawaii men and women ate their meals separately but in 1819 King Kamehameha removed all religious laws and taboos and men and women began eating together, creating the first luau feast.

luau_party_0

The name luau refers to a dish made with chicken wrapped in taro leaves (luau), and baked in coconut milk; it’s served with slightly salty, smoky Kalua pig (pork). Kalua means ‘the hole’ and refers to the pit (an imu oven) the pig is cooked in. Simply put, the pig is steamed over a long period of time and is similar to a smoky pulled pork dish.

Hawaiian-Luau Fun

We’ll be doing our Kalua pork in a pressure cooker but the flavors will be able to develop while we talk and prepare other side dishes that use traditional Hawaiian ingredients. We might even be able to talk Tammy into a little hula (we know she can)!

Join us in the Temecula Olive Oil Tasting Room, Seal Beach for our fun little Hawaiian party. Learn a little about Hawaiian tradition and a conversation about cooking with pressure cookers!

Click here to see full menu

Our class goes off next week! Thursday, June 11th 6:30 p.m.Make your reservation today!

Luau Sign

For Reservations Call (562) 296-5421


Leave a comment
Share
  • Pin it
  • Share
  • Tweet
  • Share
  • Email

The Chef, The Photographer and The Adventure

5 / 26 / 155 / 27 / 15

tastyfstops-April-watermarked


Meet my friend, Christina Peters, photographer, and experience adventure through her eyes and lens. Christina’s new website, tastyfstops.com, chronicles her adventures through food, farms, travel and more. She began her new adventure in my spring garden and through her lens and my recipes we’ll bring you through one (or more) harvests of my potager (vegetable) garden. Sign up for Christina’s newsletter and follow us through spring and summer into fall and winter. Enjoy.


Christina-blackberries-watermarkedIt’s berry season in the garden and my blackberries and boysenberries are off to an early start. This is one of Christina’s beautiful, succulent shots and here’s a tasty little recipe to get your summer started right! Blackberry Crumb Bars

And speaking of summer, check out the new cooking classes for June, we still have a few seats for this Thursday also. Two summery classes in June, A Summer Picnic Party and an Adult 4th of July menu. We’ll be hosting one more class in July (on the 9th) then I am off for another knee surgery and won’t see you back until the end of summer! So grab a spot while you can.

Mangia!

Debbi


Leave a comment
Share
  • Pin it
  • Share
  • Tweet
  • Share
  • Email

Blackberry Crumb Bars

5 / 26 / 155 / 26 / 15

blackberry crumb bar-smitten kitchen

Blackberry Crumb Bar

Save
Print
  • 6 tablespoons unsalted butter melted, and
  • 1/2 cup (1 stick), room temperature, plus more for pan
  • 1 3/4 cups all-purpose flour (spooned and leveled), plus more for pan
  • 1/2 cup packed light-brown sugar
  • 1/2 teaspoon salt
  • 1/2 teaspoon baking powder
  • 1 cup confectioners' sugar
  • 1/2 teaspoon Grand Marnier or pure vanilla extract
  • 2 large eggs
  • 10 ounces blackberries

Preheat oven to 350°. Butter an 8-inch square-baking pan. Line bottom with parchment paper, leaving an overhang on two sides; butter and flour paper, tapping out excess.

Make topping:

In a medium bowl, whisk together melted butter, brown sugar, and 1/4 teaspoon salt; add 1 cup flour, and mix with a fork until large moist crumbs form. Refrigerate topping until ready to use.

In a medium bowl, whisk together remaining 3/4 cup flour, baking powder, and remaining 1/4 teaspoon salt; set aside.

In a large bowl, using an electric mixer, beat room-temperature butter, confectioners' sugar, and vanilla until light and fluffy, add eggs, one at a time, beating well after each addition. Reduce speed to low; mix in flour mixture. Spread batter evenly in pan; sprinkle with blackberries, then chilled topping.

Bake until golden and a toothpick inserted in center comes out with moist crumbs attached, 40 to 45. Cool completely in pan. Using paper overhang, lift cake onto a work surface and cut into 16 squares.

Adapted lightly from Martha Stewart

Photo: Smitten Kitchen

Leave a comment
Share
  • Pin it
  • Share
  • Tweet
  • Share
  • Email

French Yogurt Cake

5 / 9 / 155 / 9 / 15

French Yogurt Cakes

French Yogurt Cake

Save
Print
  • 1 1/2 cup all-purpose flour
  • 2 teaspoons baking powder
  • Pinch of salt
  • 1 cup sugar
  • 1 lemon, grated and zest
  • 1/2 cup plain yogurt
  • 3 eggs
  • 1/4 teaspoon pure vanilla extract
  • 1/2 cup citrus olive oil

Center a rack in the oven and preheat the oven to 350°. Generously butter an 8 1/2-x-41/2-inch loaf pan and place the pan on a baking sheet. A cake pan, Bundt cake pan or any other pan may be used; you made need to adjust the cooking time.

Whisk together the flour, baking powder and salt.

Put the sugar and zest in a medium bowl and, with your fingertips, rub the zest into the sugar until the sugar is moist and aromatic.

Add the yogurt, eggs and vanilla and whisking vigorously until the mixture is very well blended.

Still whisking, add the dry ingredients, then switch to a large rubber spatula and fold in the oil. You’ll have a thick, smooth batter with a slight sheen. Scrape the batter into the pan and smooth the top.

Bake for 50 to 55 minutes, or until the cake begins to come away from the sides of the pan; it should be golden brown and a thin knife inserted into the center will come out clean. Transfer the pan to a rack and cool for 5 minutes, then run a blunt knife between the cake and the sides of the pan. Unmold, and cool to room temperature right side up on the rack.

Glaze (optional)

½ cup lemon marmalade mixed with 1 teaspoon water

To Make the Glaze:

Put the marmalade in a small saucepan or in a microwave-safe bowl, stir in the teaspoon of the water and heat until the jelly is hot and liquefied. Using a pastry brush, gently brush the cake with the glaze.

Adapted from Dorie Greenspan

Leave a comment
Share
  • Pin it
  • Share
  • Tweet
  • Share
  • Email

Easter Potatoes

3 / 31 / 154 / 1 / 15

potato gratin-molly stevens

Potato Gratin

Save
Print

This rich, creamy gratin gets a note of smokiness from the bacon between the layers of tender potatoes.
by Molly Stevens from Fine Cooking

  • 2-1/2 lb. Yukon Gold potatoes, peeled & sliced into 1/8-inch thick rounds
  • 2-1/2 cups heavy or light cream
  • Sea salt & fresh ground pepper, to taste
  • 4 oz. bacon
  • 3 medium leeks, white and light-green parts only, thinly sliced
  • 6 oz. grated Gruyère
  • 2 to 3 tsp. chopped fresh thyme
  • 1/4 tsp. freshly grated nutmeg
  • 1/2 cup fresh breadcrumbs
  • 1/4 cup finely grated Parmigiano-Reggiano
  • 2 tablespoons unsalted butter, melted

Serves 8

Position a rack in the center of the oven and heat the oven to 400°F. Butter or oil a 3-quart gratin dish; set aside.

Put the potatoes, cream , 1/2 tsp. salt, and a few grinds of pepper in a 12-inch skillet. Simmer, partially covered, over medium to medium-low heat, stirring occasionally and gently with a rubber spatula until the potatoes are barely tender when pierced with a fork or skewer, 8 to 12 minutes.

In a medium skillet, cook the bacon until browned and fully cooked. Set aside to cool, reserving 2 tablespoons of the fat in the skillet. Heat the reserved fat over medium-high heat and sauté leeks until tender, fragrant, and lightly browned. Season to taste with salt and pepper. When the bacon is cool, crumble it into small pieces.

Using a slotted spoon, transfer half the potatoes to the prepared gratin dish, spreading them evenly. Layer on the leeks, bacon, Gruyère, thyme, and nutmeg. Top with the remaining potatoes spreading them evenly, and pour over any liquid remaining in the pan.

In a small bowl, combine the breadcrumbs, Parmigiano-Reggiano, and melted butter.

Evenly scatter the topping mixture over the potatoes. Bake the gratin until it’s bubbly, the top is brown, and the potatoes are completely tender when poked with a fork or a skewer, 25 to 30 minutes. Let the gratin sit for at least 10 and up to 30 minutes before serving so the liquid is fully absorbed and the layers are cohesive.


Leave a comment
Share
  • Pin it
  • Share
  • Tweet
  • Share
  • Email

Artichoke Dip

3 / 5 / 153 / 28 / 15


artichokes Melissas

Walt's Wharf Artichoke Dip

Save
Print

Adapted slightly from Walt’s Wharf recipe.

  • 1/4 cup sesame oil
  • 1/4 cup olive oil
  • 3 tablespoons local honey
  • 2 tablespoons lemon juice
  • 2 teaspoons sea salt
  • 4 tablespoons Lea & Perrins Worcestershire Sauce
  • 1 cup mayo

Mix all ingredients together until well blended. Taste for seasoning and adjust as necessary for your taste. Refrigerate until ready to use.


Chef Debbi

Leave a comment
Share
  • Pin it
  • Share
  • Tweet
  • Share
  • Email

Mushroom and Gruyere Puff Pastries

12 / 14 / 14

Mushroom-Herb-and-Gruyere-Cheese-Mini-Turnovers6-690x400


Mushroom and Gruyere Puff Triangles

Save
Print

A wonderful easy appetizer to make ahead and freeze individually, pull out cook as many as you need.

  • 1 tablespoon olive oil
  • 1 tablespoon butter
  • 2 cups finely chopped Cremini mushrooms
  • 1 onion, chopped finely
  • 1 teaspoon dried Italian herbs, crushed
  • Sea salt & fresh ground pepper to taste
  • 2 tablespoon flour
  • ½ cup heavy cream
  • 3 tablespoons dry white wine
  • 1/3 cup shredded Gruyere cheese
  • 2 sheets of puff pastry, thawed (12x12 inches)
  • 1 egg + 1 tablespoon water, whisked together

Serves: 32

Preheat your oven to 400°.

Line 2 baking sheets with parchment paper. Set aside.

Heat a medium sauté pan over medium high heat, add butter and olive oil, and add the onion and sauté until translucent. Add the mushrooms, herbs, sea salt and pepper and cook until the mushrooms are lightly browned and no liquid remains in the pan.

Stir in the flour and cook for 1 minute, add the wine and cream.

Remove from the heat, and stir in the Gruyere cheese. Chill.

Place a rolling mat on your counter, or a large piece of parchment paper. Add a little flour and lightly roll out the puff pasty, cut into 16 pieces using a pizza cutter or knife.

You should keep the puff pastry as cold as possible, if it starts to stick or becomes doughy, return it to the refrigerator for about 10 min. Keep the second piece of puff pastry in the refrigerator while you work on the first one.

Scoop about 1 t tablespoon of the cold mushroom mixture into the center of the dough (do not overfill or they will leak). Fold the over in a triangle and, using a fork, press the edges together to seal them.

Place the mini turnovers onto your prepared baking sheet, at least 1 inch apart. Place in the refrigerator for 20 minutes and prepare the second batch. Refrigerate the second batch for 20 minutes for best results.

Brush the sealed edges and tops of the turnovers with the egg mixture.

Bake each tray for about 15 minutes, or until the tops are golden brown.

Adapted from Jo-Anna, A Pretty Life in the Suburbs, courtesy of Kendall Jackson

Leave a comment
Share
  • Pin it
  • Share
  • Tweet
  • Share
  • Email

Clafoutis

12 / 5 / 1412 / 7 / 14

cherry clafoutis
Photo: Merlin Menu

Clafouti

Save
Print

I am all about easy baking and this is about as easy as it gets. This country-French dessert adapts well to almost any fruit and is topped with a batter and baked til bubbly brown. It can be served warm or room temperature.

  • Batter
  • 1 cup milk
  • 1/4 cup heavy cream
  • 2 tablespoons sugar
  • 3 eggs
  • 1 tablespoon vanilla
  • ½ teaspoon salt
  • 2/3 cup all-purpose flour
  • Fruit
  • 2 tablespoons butter, melted
  • 2 tablespoons sugar
  • 3 cups fruit, if whole, peel and chop or slice
  • Confectioners' sugar for dusting

Heat the oven to 400°F.

Beat together all the batter ingredients until smooth and frothy. Set aside to rest while preparing remaining ingredients.

Pour melted butter into a 9 or 10” shallow pan, quiche pan or cake pan and sprinkle with the 2 tablespoons of sugar spreading evenly. Place fruit over the sugar and cover with the batter.

Bake for about 30 minutes or until the clafoutis is puffed and brown on top. Dust with confectioners sugar and serve immediately.

Clafoutis will collapse quickly but will still be delicious.

Leave a comment
Share
  • Pin it
  • Share
  • Tweet
  • Share
  • Email

Cioppino

12 / 5 / 1412 / 7 / 14

Cioppino

Image: Wikipedia


Save
Print

San Francisco style cioppino will warm you up on a cold day; serve with warm crusty bread and you could even imagine you heard a foghorn. This is my adaptation of a favorite dish, don’t let the long list of ingredients dissuade you; this is quite easy to make.

  • 2 tablespoon olive oil
  • 1 tablespoon butter
  • 1 medium onion, chopped
  • 1 celery, chopped
  • 2 cloves garlic, minced
  • 2 cups dry white wine
  • 1 quart chicken stock, or fish stock
  • 1 lg. can whole plum tomatoes with juice
  • 2 tablespoons Italian seasoning, crushed
  • 1 tablespoon cilantro -- chopped
  • 1 lemon, zested and juiced
  • salt and pepper
  • 1 pound white fish, halibut, sea bass, cut into large pieces
  • 1 pound small clams, washed
  • ½ pound calamari, cleaned and sliced
  • 1 pound large shrimp, peeled and deveined
  • 1 pound Dungeness crab, cut into 3-4” pieces, shell on
  • ¼ cup chopped parsley
  • ¼ cup lemon zest
  • red pepper flakes, optional
  • Lemon wedges

Serves 6

In a large Dutch oven over medium heat, add oil and butter; when butter has melted, add onion and celery; sauté until translucent. Add garlic and stir briefly, do not brown. Add wine, stock, tomatoes with juice, herbs, lemon zest and salt and pepper; bring to a boil, then turn down to a simmer and cook for 30 minutes.

Add fish and clams to simmering broth, cover and cook 5 minutes.

Add calamari and shrimp, cook until shrimp are barely pink; then add crab and press gently to immerse in broth; cover and cook just

until hot, 2 to 3 minutes.

Ladle cioppino into wide bowls and sprinkle with parsley and lemon zest. Serve with lots of crusty bread and lemon wedges.

Related Posts Plugin for WordPress, Blogger...
Leave a comment
Share
  • Pin it
  • Share
  • Tweet
  • Share
  • Email

Posts navigation

Previous Page 1 2 … 9 10 11 12 13 Next Page
Deb

Meet Chef Debbi

READ BIO

Join-Us Sign up for our newsletter to receive exclusive tips 'n tricks, and special offers on classes, tours, and more!

Recent Posts

  • New E-Book!
  • From the Pantry
  • Spaghettini at Home
  • Growing Corn
  • Spring IS Coming!

Categories

BookCUT

What's in Your Pantry?

How to stock your pantry to create delicious dishes.

Learn Chef Debbi's pantry essentials and how to substitute ingredients for pantry staples in her basic recipes for quick and easy meals.
BUY BOOK>

FacebookTwitterInstagramGooglepinterest


© 2014, DEB'S KITCHEN
Angie Makes Feminine WordPress Themes