Deb's Kitchen - Farm, Food, Wine & Lifestyle Adventures
  • Facebook
  • Google
  • Twitter
  • Instagram
  • Pinterest
  • Email
Menu
Skip to content
  • Home
  • Blog
  • Events
    • Classes
    • Tours & Adventures
  • Edible Gardening
  • Preserving
  • Recipes
    • Appetizers
    • Soups and Salads
    • Main Dishes
    • Side Dishes
    • Desserts
  • About
    • Whats In Your Pantry
    • Ask Debbi
    • Deb’s Kitchen Botanicals
    • Press
  • Contact

Author: Chef Debbi Dubbs

Easy Pizza Margherita

2 / 2 / 162 / 2 / 16

Pasolivo Pizza


Pizza, Flatbread & Calzone

Save
Print

Makes 2 flatbreads

*Stir the flour with a table knife to lighten the flour; it becomes compacted as it rests. Dip your measuring cup into the flour and use the knife to sweep the excess flour off the top of the cup. According to King Arthur Flour it should weigh 4 ¼ ounces.
Dough recipe adapted from ‘Artisan Bread in 5 Minutes a Day’

Sauce recipe will yield 2 cups and hold for several days. Adapted from Sunset Magazine

  • 1 ½ cups lukewarm water
  • 1 packet granulated yeast, 2 ¼ teaspoons
  • ½ teaspoon sea salt
  • 3 ¼ cups King Arthur unbleached white flour, measured with the scoop and sweep method*
  • Sauce:
  • 2 tablespoons olive oil
  • ½ small onion, chopped
  • 2 small cloves garlic, minced
  • 1 pound fresh tomatoes, quartered or 1 lg. can whole or crushed tomatoes
  • 1 small can tomato paste
  • 2 teaspoons dried oregano
  • 1 teaspoon dried thyme
  • 1 granulated sugar or more as needed
  • 2 tablespoons chopped fresh basil
  • Sea Salt and fresh pepper, to taste
  • Pinch crushed red pepper flakes (optional)
  • Pizza Margherita Topping
  • Sauce
  • Mozzarella, torn into pieces
  • Fresh basil, torn into pieces

Dough: (Make at least 1 day up to 5 days ahead of time)

The water should be warm to the touch but not more than 110°, and add the yeast to the water.

Add salt to the flour and whisk to distribute using a large bowl or a plastic food container with lid. Add the water to the flour all at once and mix with a wooden spoon or wet hands, the dough will be sticky. No kneading is necessary.

Loosely cover with lid and let stand at room temperature approximately 2 hrs. The dough can rise longer, up to 5 hours without affecting the results. The dough is easier to handle if you can make it the night before and refrigerate overnight.

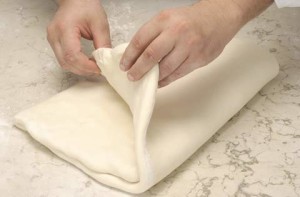
Working on a lightly floured surface, pinch off a palm sized piece of dough, shape into a round, rectangular or square shape. Dough is sticky so keep some extra flour nearby, dust your hands as necessary to shape the dough. If the dough starts to snap back you should let it rest for a few minutes and then resume shaping. I use a rolling pin to thin the dough out to my desired style

Place onto parchment paper, a dusted pizza peel or the bottom of a dusted baking sheet. You can use anything you want providing the pizza can slip right off onto the rack.

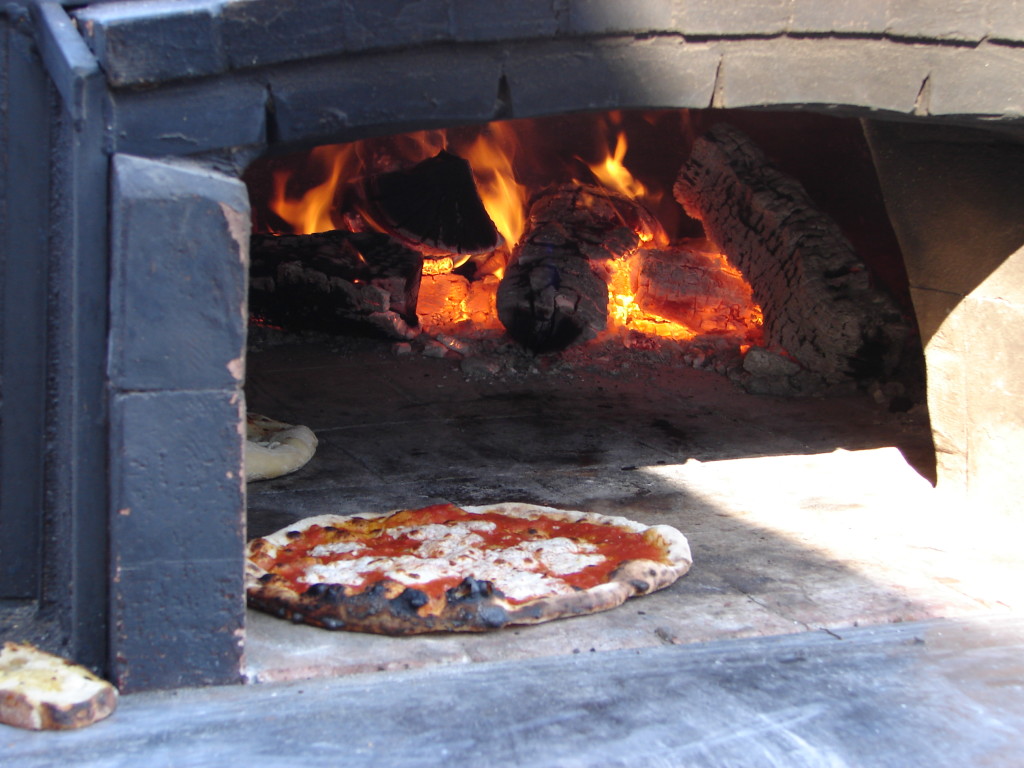
If you are baking in an oven, preheat your oven to 500° or as high as it will go. Top the dough with anything you like, slid it into the hot oven and bake for 12-14 minutes.

Sauce:

Heat a deep saucepan big enough to hold all the ingredients, add the oil and onions and sauté until translucent. Add the garlic and stir briefly.

Place all the ingredients along with the garlic and onions into a blender, or use an immersion blender and puree.

Ladle or spoon onto pizza dough leaving an clean edge around the outside of the dough. Sprinkle or place the cheese on top and bake on a hot pizza stone for about 6-8 minutes, checking frequently. Sprinkle with fresh basil and let rest for a minute or two before slicing. Mangia!

Leave a comment
Share
  • Pin it
  • Share
  • Tweet
  • Share
  • Email

Temecula Olive Oil Tasting Room, Seal Beach Feb. Cooking Demo

2 / 2 / 161 / 22 / 17

Temecula Olive Oil Tasting Room

Seal Beach

Thur. Feb. 4th  Sold Out!! Repeat class available Thur. Feb 18th, don’t miss out!

6:30 – 8:30, approximately

Also presenting this Valentine Day menu in the

Temecula Olive Oil, Temecula Tasting Room in Old Town

Sat. Feb. 13th, 12-2 Still some spots available

See below for reservations

Beef Wellington Tarts with Mushroom Blue Cheese Sauce 800 2765

Panzanella Salad with Ca. Avocado

            A classic Italian salad with Toasted Bread Cubes

Creamy Ca. Avocado & Blood Orange Olive Oil Vinaigrette

Individual Puff Pastry Filet Mignon Tarts

with Caramelized Onion-Mushroom & Blue Cheese Sauce

Grilled Asparagus with Lemon Gremolata

            Spring asparagus with a Garlic-Lemon Dust

Strawberry Brownie Bites 

For Seal Beach Reservations please call:

562-296-5421

For Temecula Reservations please call:
951-693-0607

Leave a comment
Share
  • Pin it
  • Share
  • Tweet
  • Share
  • Email

Fried Blue Cheese Stuffed Olives

1 / 21 / 16

Here’s a great ‘From The Pantry’ appetizer, serve up with any dip or all alone!


Fried Blue Cheese Stuffed Olives

Save
Print

Great out of the pantry appetizer….

  • 1/2 cup all-purpose flour
  • 2 large eggs, beaten
  • 3/4 cup dried bread crumbs
  • 40 Blue Cheese Stuffed Olives
  • Vegetable oil, for deep frying
  • Lemon wedges, for serving

Fill three bowls, from left to right, with the flour, eggs, and bread crumbs. Stuff the olives with your choice of fillings.

Spear and olive with a toothpick (optional- you can use your hands if you like) and coat it in the flour evenly, shaking off the excess, into the egg, and then roll it in the bread crumbs. Use a fork to pop it off the toothpick onto a plate. Repeat until all of the olives are crumbed.

Heat 1 1/2 inches of oil in a medium saucepan until it reaches 350°F on a deep-fat thermometer or a candy thermometer. Place a few of the olives at a time in the bowl of a slotted metal spoon and lower them into the oil. Fry in batches until golden brown, less than 1 minute. Fish out the olives with a spoon and transfer them to paper towels. Spritz them with lemon while sizzling, if you like. Serve hot.

Leave a comment
Share
  • Pin it
  • Share
  • Tweet
  • Share
  • Email

Beef & Barley Soup

1 / 7 / 161 / 19 / 16

Barley

Beef Barley Soup

Save
Print

The flavor of this soup relies on using a good and flavorful beef stock. Read the label to make sure it’s not over salted. Or you could try making a batch of your own!

  • 1 tablespoon olive oil
  • 1 tablespoon unsalted butter
  • 1 pound beef stew meat or
  • 1 ½ cups leftover beef, chopped or shredded
  • Sea Salt and ground pepper
  • 1 cup pearl barley, cooked*
  • 1 small leek, diced
  • 1 large carrot, peeled and diced into bite sized pieces
  • 1 medium stalk celery, peeled and diced as you did the carrots
  • 1 medium onion, diced similar size to carrot and celery
  • 4 cups good beef stock

Heat the olive oil and butter in a Dutch oven or pressure cooker**.

Season the meat with salt and pepper and brown in batches, don’t crowd the meat or it will steam and not brown. Remove the meat and set aside. If using already cooked meat skip this step and jump ahead.

Add a little more olive oil to the pan if necessary, add the vegetables and cook over medium heat, stirring occasionally, until the vegetables soften, about 5 minutes.

Add the stock and bring to a boil. Lower the heat to a simmer and cook for 1 hour.

Add the barley and the reserved meat; simmer the soup for another 15 or 20 minutes, until the barley is tender. Season with a little salt and pepper if needed and enjoy.

To cook barley, bring 4 cups of water to a boil and add the barley. Simmer uncovered for 30 minutes, drain, and set aside.

**To pressure cook the soup: After browning the meat, add the stock and barley to the pan, place the lid on the pressure cooker, bring to full pressure and cook for 10 min. I let the pressure cooker naturally release pressure before continuing.

Add vegetables and return to pressure over high heat. Cook 15 minutes and let pressure release. Season to taste with salt and pepper.

Barley photo credit, Fine Cooking.  To read about barley follow this link, Fine Cooking-Barley


2 Comments
Share
  • Pin it
  • Share
  • Tweet
  • Share
  • Email

January Cooking Class

1 / 7 / 16

Temecula Olive Oil Tasting Rooms

Cooking Class

-Beet and Tangerine Salad edited

Seal Beach, Main St.

Jan 14th, Thursday

6:30-8:30p.m., approximately

SOLD OUT!

2nd CLASS ADDED

WE’VE ADDED THUR., JAN 28TH

IN SEAL BEACH

CALL FOR RESERVATIONS TODAY!

DKB-12

Temecula, Old Town

Jan 16th, Saturday

12-2 p.m., approximately

Menu for both venue’s

Blue Cheese Stuffed Fried Olives with Roasted Red Pepper Dip

Tangerine, Beet & Avocado Salad

Braised Chicken Breast with White Wine Crème Fraîche Sauce
on a bed of Blanched Spinach with Bacon

Tomato Stuffed Raviolis

Meyer Lemon Cupcakes

 
10 – 20% off on all purchases the night of the class

For Seal Beach Reservations Call:
562-296-5421

For Temecula Reservations please call:
951-693-0607

Sponsored by

Leave a comment
Share
  • Pin it
  • Share
  • Tweet
  • Share
  • Email

Quick Puff Pastry

12 / 31 / 15

puff pastry fold

Use this delicious puff pastry to make these quick and easy

Smoky Ham & Gruyere Cheese Empanadas. 

ham and cheese empanadas

Save
Print

I learned this recipe from Nick Malgieri, it takes about 15 minutes to make once you learn the technique. Keep it in your freezer for easy access to sweet and savory dishes.

  • 1 1/4 stick of cold unsalted butter
  • 1/4 cup ice water
  • 1/2 teaspoons salt
  • 1 cup flour*

Cut 1 stick of butter into ½ - to ¼ “ dices, place on a plate and refrigerate.

Measure the water and stir in the salt to dissolve. Set aside.

Coarsely dice the remaining ¼ stick of butter. Place the flour in the work bowl of a food processor fitted with a metal blade. Add the ¼ stick of butter and pulse until the butter is absorbed—about ten to twelve 1-second pulses.

Add the chilled butter and pulse once or twice to distribute. Add water and salt mixture and pulse repeatedly, until the dough forms a rough ball—do not over process. (I have found with this method the dough doesn’t form much of a ball, do not add extra water, just continue with the recipe and it will come together easily).

Invert the mixture onto a floured work surface or rolpat. Remove the blade and press the dough into a rough rectangle.

Flour the dough and press (don’t roll) it with a rolling pin to flatten. Move the dough, making sure there is still flour under it to prevent it from sticking, and give the dough a 90° turn. Press again.

Again making sure that the surface and the dough are adequately floured, roll the dough until it forms a rectangle about 15 x 24”.

Fold the top long edge over the middle section, and then fold the bottom edge over that to make 3 equal layers. Roll the dough up like a jelly roll from one of the short edges. Use the palm of your hand to flatter the dough into a rectangular shape, about 6 x 10” and about 1” thick.

Refrigerate for at least 1 hour before using or the dough can be stored in the refrigerator up to 2 or 3 days or freeze up to 3 months.

*4 - 1/4 ounces if using King Arthur Flour, which I prefer, or use the scoop & sweep method.

Leave a comment
Share
  • Pin it
  • Share
  • Tweet
  • Share
  • Email

New Year Empanadas

12 / 31 / 1512 / 31 / 15

ham and cheese empanadas

Another quick and easy appetizer from the pantry, the refrigerated pantry that is. Make ahead, freeze and cook as many as you like. I made these pastries using a 3″ cutter and fold them over to look like half moons. You can make them round, square, make them larger or smaller, whatever your needs might be.

Try and get puff pastry that is made with real butter for a better flavor and defrost it in the refrigerator. The trick to working with puff pastry is to keep it as cold as possible, if it becomes sticky, put it back in the refrigerator until it firms up. If you don’t have time to freeze the pastries before baking, let them rest and chill up in the refrigerator while your oven is preheating.

(If you’d like to try your hand at making Quick Puff Pastry at home try this recipe~it’s easy! Just start the day before)

Quick Puff Pastry Recipe

Make extra, these are tasty treats that will keep for up to 3 months in the freezer.

Happy New Year!

Smoked Ham and Gruyere Cheese Empanadas

Save
Print
  • 1 box puff pastry, defrosted or homemade
  • 1 tablespoon Dijon mustard, approximately
  • ¾ cup Manchego or gruyere cheese, grated
  • ¾ cup Serrano or Black Forest ham, chopped
  • 1 egg whisked with a little water

Preheat oven to 400°. Line two baking sheets with parchment paper and set aside.

Roll out dough* and using a round cutter, cut shapes in 3" rounds.

Spread with a small amount of mustard and sprinkle half the dough with ham and cheese leaving a 1/4" border around the edge of the dough. Brush the edge of the dough with water, fold over and crimp edges with a fork. It's best to freeze the empanadas and cook from a frozen state. Freeze individually on a baking sheet and then store in a freezer tight bag. If you don’t have time to freeze then bake, refrigerate them until they are very cold, about 1 hr.

Brush the egg/water mixture over top of the dough and bake for 15 min or until crust is lightly browned. If baking from a frozen state it may take 25 minutes to baking.

*Keep puff pastry as cold as possible, if dough begins to stick return to the refrigerator until cold and then continue with recipe.


Leave a comment
Share
  • Pin it
  • Share
  • Tweet
  • Share
  • Email

Chocolate-Peppermint Crunch Cookies

12 / 22 / 15

Chocolate-Peppermint Crinkle Cookies


Chocolate-Peppermint Crunch Cookies

Save
Print

Makes about 36 cookies

This is not an original recipe but I’m not exactly sure where or when I started making these delicious cookies. I apologize for not giving credit to the creator!

  • 1 1/2 cups all-purpose flour
  • 1/2 cup unsweetened cocoa powder
  • 2 teaspoons baking powder
  • ½ teaspoon salt
  • ¼ cup chopped walnut pieces, optional
  • ¼ cup crushed peppermint pieces, optional*
  • 8 tablespoons (1 stick) unsalted butter, softened
  • 1 cup packed light brown sugar
  • 2 large eggs
  • 8 ounces bittersweet chocolate, melted and cooled*
  • 1 teaspoon peppermint extract, or vanilla
  • 1/2 cup granulated sugar
  • 1 cup powdered sugar

In a medium bowl, whisk together the flour, cocoa powder, baking powder, and salt. Add the chopped walnuts and peppermint chips, stir to distribute well.

In the bowl of a stand mixer, fitted with the paddle attachment, or in a large mixing bowl, cream the butter and brown sugar until light and fluffy, about 3 minutes.

Add the eggs and vanilla, and beat until completely incorporated. Add the melted chocolate and beat until completely incorporated. Gradually fold in the flour mixture until just combined.

Chill the dough for at least 2 hours until firm, or up to overnight.

Remove the dough from the refrigerator. Preheat the oven to 350°F. Line a baking sheet with parchment paper or a silicone baking mat.

Place the granulated and powdered sugar in separate small bowls. Scoop 1 tablespoon of the dough, form into a ball, and place on a plate. Repeat with the remaining dough.

Roll each ball in granulated sugar and then in powdered sugar to coat. Place on the baking sheet 2 inches apart. Bake for 10 to 12 minutes, until the cookies begin to spread and the tops split. Remove from the oven and cool for a few minutes on the baking sheet, then transfer the cookies to wire cooling racks. Let the baking sheet cool, and repeat with the remaining dough.

Cookies will keep in an airtight container for about one week.

*To melt the chocolate, place in a microwave safe bowl and heat for 30 seconds, stir, and heat at 10 second intervals until melted, stir occasionally.

*To crush peppermint pieces, place several candy canes or peppermint candies into a freezer type bag and crush with a meat pounder or rolling pin.

Leave a comment
Share
  • Pin it
  • Share
  • Tweet
  • Share
  • Email

How To Make Perfect Gravy

12 / 15 / 15

Christina Peters, The Food Shooter, and I decided we needed to make a second video using the Perfect Stock recipe and this is what we offer you today. You will have Perfect Gravy for your holiday, just follow our simple tips!

Leave a comment
Share
  • Pin it
  • Share
  • Tweet
  • Share
  • Email

Bone Broth or Stock

12 / 9 / 1512 / 9 / 15

24HeroJars-2204


There is very little difference between bone broth and stock, actually it’s just the addition of a good apple cider vinegar like Bragg. The terms broth and stock are confusing as they seem to be used interchangeably for one another. Broth is usually made from the meat where stock is made with bones. Stock is a little hardier and more flavorful, both enhance any dish you use them in or if you just heat and eat as a soup. They keep well for 3 days refrigerated, you can re-heat the stock and keep for another 3 days or freeze for up to 6 months. I like to freeze in 1/2 cup portions so I can use the stock to make rice instead of using water. Vegetables simmered in stock is also a great way to get extra flavor. When making stock be sure not to add salt until it is all finished, the stock will reduce as it cooks and if you salt it initially it will become over salted.

Here’s a quick little video that Christina Peters & I made

The Food Shooter and The Chef

Leave a comment
Share
  • Pin it
  • Share
  • Tweet
  • Share
  • Email

Holiday Gift Giving

12 / 4 / 1512 / 4 / 15

Here are some of my favorite gifts for anyone!

….’If you want to learn about food…COOK…and Chef Debbi has created a guideline that taps into the practical and encourages the intuitive cook inside us all!’

Helene Kennan, Former Getty Ex. Chef

What's In Your Pantry


My specially designed gift basket, hand picked ‘Pantry Items’ from the best, Melissa’s produce. Included is a copy of my ‘What’s In Your Pantry’ book guiding you through the basics of stocking your kitchen from knives and cookware to seasonal recipes. And an exceptional selection of dried herbs, mushrooms, spices and more from Melissa’s Produce. Give the experts at Melissa’s a call for your special delivery! 800-588-0151

Chef Debbi basket

A sampling of other tasty gift baskets from our friends at Melissa’s!

Exotic Fruit BasketParty Basket

Leave a comment
Share
  • Pin it
  • Share
  • Tweet
  • Share
  • Email

Braised Short Ribs

12 / 1 / 1512 / 1 / 15

short ribs-debskitchen


Easy Braised Short Ribs

Save
Print

Braising a tough cut of meat over a long period of time makes the meat deep, rich and delicious. With a small amount of preparation and a long cooking time these are easy to make and warms you up on those cold winter days. Make extra! You’ll want them for leftovers, you can make a ragu out of them, a pot pie or even a Shepherds pie for quick weeknight dinners. You’ll get more flavor out of the short ribs if they are on the bone, they will fall right off the bone after their long slow cooking so they’ll be easy to remove.

Serves 4

  • Olive oil
  • 1/3 cup flour (or more as needed)
  • 2 teaspoons sea salt
  • 1 teaspoon ground pepper
  • 4 pounds short ribs on the bone
  • 1 brown onion, chopped
  • 1 medium carrot, roughly chopped
  • 2 stalks celery, roughly chopped
  • 1 tablespoon tomato paste (double concentrate from a tube-found in the ‘Italian’ section
  • 2 tablespoons flour
  • ¼ cup dry red wine
  • 1 qt. beef stock, may use chicken stock
  • 1 bouquet garni (1 bay leaf, 1 sprig thyme, 2 sprigs Italian parsley tied together in cheesecloth

Heat oven to 350°.

Mix flour, salt and pepper together in a shallow bowl or on a plate.

Heat a large Dutch oven over medium high heat; add enough oil to coat the bottom of the pan.

Dry short ribs well and dredge in the flour mixture, shake off the excess and place the meaty side into the hot oil. Do not crowd the meat in the pan or it will not brown properly. This is the most important step in braising so take your time. Remove the ribs, set aside and continue until all ribs are browned.

In the same pan, add more oil as necessary, add onions, carrots, celery to the pan and sauté until lightly browned.

Add tomato paste and stir to coat all the vegetables and cook the paste a little, about 2 minutes.

Add flour and stirring constantly cook for another 5 minutes without burning. The flour may turn a little dark but that’s fine.

Add the dry red wine to the pan and scrape the bits that have stuck to the bottom of the pan. Let reduce and thicken slightly. Remove from the heat.

Return the ribs to the pan, cover with stock and add the bouquet garni. Put the lid on the Dutch oven and bake for 3 hours. Remove bouquet garni.

Juices may be thickened into gravy with a beurre maníe, roux or cornstarch slurry.

Beurre Manie, Roux, Cornstarch Slurry

Save
Print

Beurre Manie

Mix together equal parts softened butter and flour until it looks like thick butter and all the flour is incorporated.

Roux

Melt 2 Tb. butter in a pan, add 2 Tb. flour, whisk together and cook until lightly browned

Cornstarch Slurry

2 parts cold water mixed with 1 part cornstarch

Whisk any of these into your hot liquid, stirring until thickened. Don't over-cook the cornstarch slurry or it will start to break down and become thin again.

Related Posts Plugin for WordPress, Blogger...
Leave a comment
Share
  • Pin it
  • Share
  • Tweet
  • Share
  • Email

Posts navigation

Previous Page 1 2 … 15 16 17 18 19 … 25 26 Next Page
Deb

Meet Chef Debbi

READ BIO

Join-Us Sign up for our newsletter to receive exclusive tips 'n tricks, and special offers on classes, tours, and more!

Recent Posts

  • New E-Book!
  • From the Pantry
  • Spaghettini at Home
  • Growing Corn
  • Spring IS Coming!

Categories

BookCUT

What's in Your Pantry?

How to stock your pantry to create delicious dishes.

Learn Chef Debbi's pantry essentials and how to substitute ingredients for pantry staples in her basic recipes for quick and easy meals.
BUY BOOK>

FacebookTwitterInstagramGooglepinterest


© 2014, DEB'S KITCHEN
Angie Makes Feminine WordPress Themes