Deb's Kitchen - Farm, Food, Wine & Lifestyle Adventures
  • Facebook
  • Google
  • Twitter
  • Instagram
  • Pinterest
  • Email
Menu
Skip to content
  • Home
  • Blog
  • Events
    • Classes
    • Tours & Adventures
  • Edible Gardening
  • Preserving
  • Recipes
    • Appetizers
    • Soups and Salads
    • Main Dishes
    • Side Dishes
    • Desserts
  • About
    • Whats In Your Pantry
    • Ask Debbi
    • Deb’s Kitchen Botanicals
    • Press
  • Contact

Category Archives: Blog

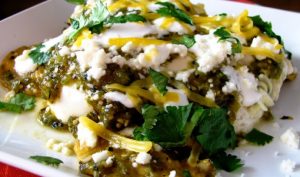
Easy Chicken Chilaquiles

5 / 3 / 16

chicken chilaquiles


Save
Print
  • 1 ½ cups roasted chicken, shredded
  • 1 1/2 cups red or green salsa
  • 3/4 cup chicken broth
  • 1/2 cup sour cream
  • 1 bag tortilla chips
  • 1/4 cup chopped cilantro
  • 2 cups shredded cheese, any cheddar-jack blend or Mexican crumbled cheese
  • 1 large Ca. Hass avocado, sliced
  • ½ cup sliced jalapenos, optional

Preheat your oven to 350°.

Combine the salsa and chicken stock into a large saucepan and bring to a simmer. Add the chicken and cook for 10 minutes over low. Remove from heat and add the sour cream and cilantro, stir to blend.

In a 9 x 12 baking dish, layer half of the chips and top with half the chicken mixture, and top with half the cheese. Repeat layer with remaining ingredients and bake for about 30 minutes or until all hot and gooey! Top with avocado slices and jalapeños if using.

Leave a comment
Share
  • Pin it
  • Share
  • Tweet
  • Share
  • Email

Herbal Gardening Tips

4 / 28 / 16

Tips from Chef Debbi’s presentation at The South Coast Plaza Garden Show

From Your Herbal Garden
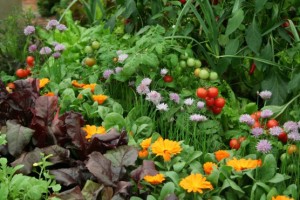
Companion Planting

General Guideline for Growing Herbs

Most herbs like well-drained soil let slightly dry out except drought tolerant plants (lavender, rosemary) let those dry out a little bit more. Scratch down and inch or two in the pot and if it’s dry water.

Full Sun

Basil – Chives – Dill – Fennel – -Oregano – Rosemary – Tarragon – Thyme – Lemon Verbena

Partial Sun

Chervil – Cilantro (cool season herbs) – Lemon Balm – Mint

Pick before they flower or when they have buds on them

Never harvest more than 1/3 plant, it may not recover

Deadhead some; let others go to seed & flower to attract beneficial insects, butterflies & bees

Annual Herbs such as basil, cilantro, dill, nasturtium that grow and die in a year’s cycle.

Biennial Herbs such as sage and parsley will grow one year and bloom/set seed the next.

Perennial Herbs such as bay (which can be grown in a large container), tarragon, lavender, lemon balm, oregano can grow 3 years or longer.

Container Growing

Some larger herbs, rosemary for one, are better grown in the ground. Good for containers, Ca. bay, thyme, lemon balm (mint), parsley

Using a container, choose an appropriate size

Use an organic potting soil

Check for water needs frequently and fertilize with fish emulsion once a month

Herbs for Tea

Bee Balm, Bergamot, German Chamomile a 2’ annual, Mint

Fennel, leaves & seeds, Lemon Balm (mint family), Lemon Verbena, Mint, Rose Hips (seeds cases)

Pick leaves in the morning, when they have the most oil in the leaves/flowers

1 cup tea=1/4 cup of leaves and/or flowers, steep 5 minutes

Herbs for Potpourri

Lavender, lemon balm, rose, mint, thyme, calendula, bee balm, sweet woodruff

Cooking with Herbs

Keep herbs in a vase with fresh water; remove any leaves from the bottom of the stem that might be submerged. Do not wash until ready to use. Dry in a rolled up paper towel.

Herbs to Use With Food

Chicken: thyme, rosemary, parsley, tarragon

Pork: sage, rosemary, thyme

Fish: lemon verbena or lemon balm, chives, tarragon, dill, cilantro

Beef: rosemary, thyme, parsley

Lamb: rosemary, thyme, mint

Vegetables: thyme, oregano, lemon verbena

Add dried herbs at the beginning of preparing a dish, crush in the palm of your hand or in a mortar and pestle.

Fresh herbs should be added at the end of cooking.

If using fresh in place of dried use 1 – 2 times as many herbs as the recipe calls for

Herb Butters or Cheese

Drain plain yogurt overnight in cheesecloth

Mix with fresh chopped herbs for a cheese dip

Or

Add chopped herbs to room temperature butter,

Roll up in plastic wrap into a cylinder, freeze and slice off a piece to add to fish, steak or chicken.

Herbal Vinegar

Flavor vinegar for use in cooking and in vinaigrettes.

Bruise one cup of leaves for every 2 cups of white wine or delicate vinegar. Allow to steep for two weeks.

Bath Salts

You can use your favorite essential oil or blend. Mix with Epsom salt, essential oil and a little food dye. Let the mixture dry, place in a jar or muslin bag.

Rosemary Lavender Soap Recipe

3          cups glycerin soap base*

1/4      cup infusion of lavender flowers and rosemary leaves

1 1/2   teaspoon, lavender oil

1/2      teaspoon rosemary oil

1          pulverized dried rosemary

Combine melted base and herbal ingredients, stir until blended, then pour into molds and cool.

* Craft Stores, Michaels


Lip Balm

1 Tb. + 1 tea. Beeswax, chopped

1 Tb. Shea Butter

3 Tb. Almond, Coconut or Olive Oil

15 drops organic essential oil

Melt everything together over low heat except essential oil. Remove from heat and stir in essential oil. Pour into tubes or tins and let cool.


Leave a comment
Share
  • Pin it
  • Share
  • Tweet
  • Share
  • Email

South Coast Plaza Garden Show

3 / 18 / 16

The Southern California Spring Garden Show

The Southern California Spring Garden Show

From Your Herbal Garden Seminars

potted herbs

Thurs. April 28th 2 p.m.

Sun. May 1st 11:30 a.m.

Free

Leave a comment
Share
  • Pin it
  • Share
  • Tweet
  • Share
  • Email

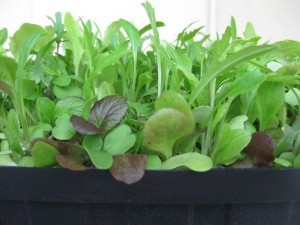
Microgreens & Sprouts

3 / 17 / 163 / 18 / 16


the plant stand logo

Sat. March 19th

10 – 11 a.m. Free

We’ll be exploring the world of

Microgreens & Sprouts

Moved to Sat. March 19th 10 – 11

Microgreen-Earthwise Gardening

Join us for some conversation and a tasty bite!

The Plant Stand
2972-A Century Place
(In the back)
Costa Mesa, Ca

(714) 966-0797

Photo from Earthwise Gardening

Leave a comment
Share
  • Pin it
  • Share
  • Tweet
  • Share
  • Email

March Cooking Class

3 / 15 / 163 / 15 / 16

TOOC LOGO

Demo Cooking Class

We still have some spaces for our March 24th class! Sign up today!

March Menu

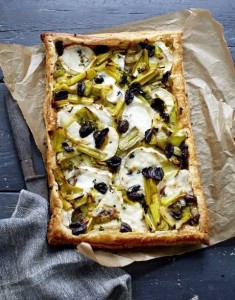
Leek, Goat Cheese & Olive Tart-Bill Granger

Leek Tart with Goat Cheese & Olives

Pork Scallopini with Leek Caper Vinaigrette

Olive Oil & Herb Roasted Winter Vegetables

Wild Mushroom Bread Pudding

Sea Salt Caramel Apple Cake in a Jar

Class Dates:

Seal Beach Tasting Room

Thursday, March 10th  SOLD OUT!

Catch the same menu on Thurs. March 24th

6:30-8:30, approximately

Call (562) 296-5421 for reservations

Header

Temecula Tasting Room

Saturday, March 12th 12 – 2, approximately

Call (866) 654-8396 for reservations

Photo: Bill Granger’s Leek Tart

Leave a comment
Share
  • Pin it
  • Share
  • Tweet
  • Share
  • Email

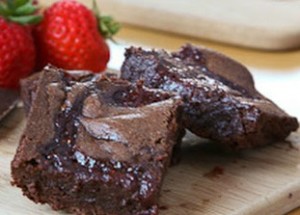
Strawberry Brownie Bites

2 / 23 / 16

This is a recipe that we prepared in our Feb. classes and I’ve updated the brownie recipe to a new one that I really prefer. The recipe is from King Arthur Flour Co. If you’ve never been to their website, you should really treat yourself! Enjoy!

strawberries & brownies debskitchen

Save
Print
  • 1 cup unsalted butter
  • 2 1/4 cups sugar
  • 1 1/4 cups Double-Dutch Dark Cocoa or Dutch-process cocoa
  • 1 tablespoon espresso powder
  • 1 teaspoon salt
  • 1 teaspoon baking powder
  • 1 tablespoon vanilla extract
  • 4 large eggs
  • 1 1/2 cups King Arthur Unbleached All-Purpose Flour
  • 2 cups chocolate chips
  • 1 cup chopped nuts, optional
  • Cheesecake filling
  • 12 oz. cream cheese, room temperature
  • ¼ - ½ cups powdered sugar
  • ¼ cup strawberry jam
  • 1 pint strawberries, halved

Preheat the oven to 350°F. Lightly grease a 10" x 15" jelly roll pan or a 9" x 13" pan. For guaranteed easy removal of the brownies, line the greased pan with parchment, and grease the parchment.

In a saucepan set over low heat, melt the butter. Add the sugar, stirring to combine. Remove from heat.

Stir in the cocoa, espresso powder, salt, baking powder, and vanilla.

Whisk in the eggs, stirring until smooth.

Add the flour, chips, and optional nuts, again stirring until smooth.

Spoon the batter into the prepared pan.

Bake the brownies for 28 to 34 minutes, until a cake tester inserted into the center comes out clean. The brownies should feel set on the edges, and barely set in the center.

Remove the brownies from the oven, and cool for at least 1 hour before cutting.

Use a 1 1/2" round cutter to cut as many circles as possible (about 46) out of the brownies in a 10" x 15" pan. You'll get about 38 from a 9" x 13" pan. Wrap well; enjoy the leftover scraps.

Filling

Combine the cream cheese, powdered sugar and strawberry puree until smooth.

Once the brownies have cooled, pipe the cheesecake filling into the center and top with the strawberry. Top with the halved strawberries, serve immediately. For a great topping marinated the strawberries in some quality balsamic vinegar for about ½ hour!

Store all ingredients separately if serving at a later time.

Adapted from King Arthur Flour

Leave a comment
Share
  • Pin it
  • Share
  • Tweet
  • Share
  • Email

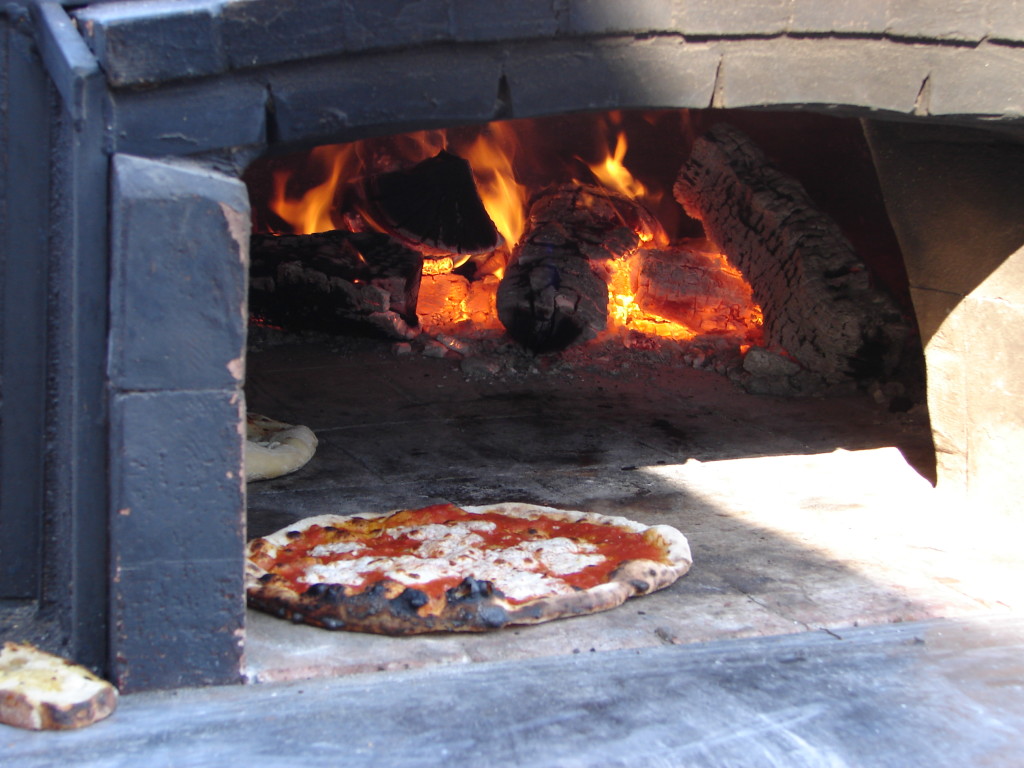
Easy Pizza Margherita

2 / 2 / 162 / 2 / 16

Pasolivo Pizza


Pizza, Flatbread & Calzone

Save
Print

Makes 2 flatbreads

*Stir the flour with a table knife to lighten the flour; it becomes compacted as it rests. Dip your measuring cup into the flour and use the knife to sweep the excess flour off the top of the cup. According to King Arthur Flour it should weigh 4 ¼ ounces.
Dough recipe adapted from ‘Artisan Bread in 5 Minutes a Day’

Sauce recipe will yield 2 cups and hold for several days. Adapted from Sunset Magazine

  • 1 ½ cups lukewarm water
  • 1 packet granulated yeast, 2 ¼ teaspoons
  • ½ teaspoon sea salt
  • 3 ¼ cups King Arthur unbleached white flour, measured with the scoop and sweep method*
  • Sauce:
  • 2 tablespoons olive oil
  • ½ small onion, chopped
  • 2 small cloves garlic, minced
  • 1 pound fresh tomatoes, quartered or 1 lg. can whole or crushed tomatoes
  • 1 small can tomato paste
  • 2 teaspoons dried oregano
  • 1 teaspoon dried thyme
  • 1 granulated sugar or more as needed
  • 2 tablespoons chopped fresh basil
  • Sea Salt and fresh pepper, to taste
  • Pinch crushed red pepper flakes (optional)
  • Pizza Margherita Topping
  • Sauce
  • Mozzarella, torn into pieces
  • Fresh basil, torn into pieces

Dough: (Make at least 1 day up to 5 days ahead of time)

The water should be warm to the touch but not more than 110°, and add the yeast to the water.

Add salt to the flour and whisk to distribute using a large bowl or a plastic food container with lid. Add the water to the flour all at once and mix with a wooden spoon or wet hands, the dough will be sticky. No kneading is necessary.

Loosely cover with lid and let stand at room temperature approximately 2 hrs. The dough can rise longer, up to 5 hours without affecting the results. The dough is easier to handle if you can make it the night before and refrigerate overnight.

Working on a lightly floured surface, pinch off a palm sized piece of dough, shape into a round, rectangular or square shape. Dough is sticky so keep some extra flour nearby, dust your hands as necessary to shape the dough. If the dough starts to snap back you should let it rest for a few minutes and then resume shaping. I use a rolling pin to thin the dough out to my desired style

Place onto parchment paper, a dusted pizza peel or the bottom of a dusted baking sheet. You can use anything you want providing the pizza can slip right off onto the rack.

If you are baking in an oven, preheat your oven to 500° or as high as it will go. Top the dough with anything you like, slid it into the hot oven and bake for 12-14 minutes.

Sauce:

Heat a deep saucepan big enough to hold all the ingredients, add the oil and onions and sauté until translucent. Add the garlic and stir briefly.

Place all the ingredients along with the garlic and onions into a blender, or use an immersion blender and puree.

Ladle or spoon onto pizza dough leaving an clean edge around the outside of the dough. Sprinkle or place the cheese on top and bake on a hot pizza stone for about 6-8 minutes, checking frequently. Sprinkle with fresh basil and let rest for a minute or two before slicing. Mangia!

Leave a comment
Share
  • Pin it
  • Share
  • Tweet
  • Share
  • Email

Fried Blue Cheese Stuffed Olives

1 / 21 / 16

Here’s a great ‘From The Pantry’ appetizer, serve up with any dip or all alone!


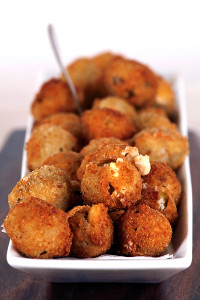
Fried Blue Cheese Stuffed Olives

Save
Print

Great out of the pantry appetizer….

  • 1/2 cup all-purpose flour
  • 2 large eggs, beaten
  • 3/4 cup dried bread crumbs
  • 40 Blue Cheese Stuffed Olives
  • Vegetable oil, for deep frying
  • Lemon wedges, for serving

Fill three bowls, from left to right, with the flour, eggs, and bread crumbs. Stuff the olives with your choice of fillings.

Spear and olive with a toothpick (optional- you can use your hands if you like) and coat it in the flour evenly, shaking off the excess, into the egg, and then roll it in the bread crumbs. Use a fork to pop it off the toothpick onto a plate. Repeat until all of the olives are crumbed.

Heat 1 1/2 inches of oil in a medium saucepan until it reaches 350°F on a deep-fat thermometer or a candy thermometer. Place a few of the olives at a time in the bowl of a slotted metal spoon and lower them into the oil. Fry in batches until golden brown, less than 1 minute. Fish out the olives with a spoon and transfer them to paper towels. Spritz them with lemon while sizzling, if you like. Serve hot.

Leave a comment
Share
  • Pin it
  • Share
  • Tweet
  • Share
  • Email

Beef & Barley Soup

1 / 7 / 161 / 19 / 16

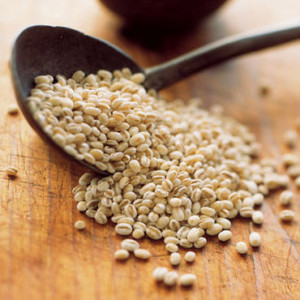
Barley

Beef Barley Soup

Save
Print

The flavor of this soup relies on using a good and flavorful beef stock. Read the label to make sure it’s not over salted. Or you could try making a batch of your own!

  • 1 tablespoon olive oil
  • 1 tablespoon unsalted butter
  • 1 pound beef stew meat or
  • 1 ½ cups leftover beef, chopped or shredded
  • Sea Salt and ground pepper
  • 1 cup pearl barley, cooked*
  • 1 small leek, diced
  • 1 large carrot, peeled and diced into bite sized pieces
  • 1 medium stalk celery, peeled and diced as you did the carrots
  • 1 medium onion, diced similar size to carrot and celery
  • 4 cups good beef stock

Heat the olive oil and butter in a Dutch oven or pressure cooker**.

Season the meat with salt and pepper and brown in batches, don’t crowd the meat or it will steam and not brown. Remove the meat and set aside. If using already cooked meat skip this step and jump ahead.

Add a little more olive oil to the pan if necessary, add the vegetables and cook over medium heat, stirring occasionally, until the vegetables soften, about 5 minutes.

Add the stock and bring to a boil. Lower the heat to a simmer and cook for 1 hour.

Add the barley and the reserved meat; simmer the soup for another 15 or 20 minutes, until the barley is tender. Season with a little salt and pepper if needed and enjoy.

To cook barley, bring 4 cups of water to a boil and add the barley. Simmer uncovered for 30 minutes, drain, and set aside.

**To pressure cook the soup: After browning the meat, add the stock and barley to the pan, place the lid on the pressure cooker, bring to full pressure and cook for 10 min. I let the pressure cooker naturally release pressure before continuing.

Add vegetables and return to pressure over high heat. Cook 15 minutes and let pressure release. Season to taste with salt and pepper.

Barley photo credit, Fine Cooking.  To read about barley follow this link, Fine Cooking-Barley


2 Comments
Share
  • Pin it
  • Share
  • Tweet
  • Share
  • Email

January Cooking Class

1 / 7 / 16

Temecula Olive Oil Tasting Rooms

Cooking Class

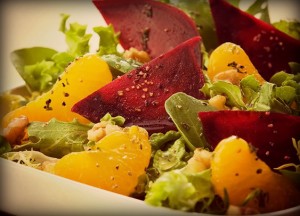
-Beet and Tangerine Salad edited

Seal Beach, Main St.

Jan 14th, Thursday

6:30-8:30p.m., approximately

SOLD OUT!

2nd CLASS ADDED

WE’VE ADDED THUR., JAN 28TH

IN SEAL BEACH

CALL FOR RESERVATIONS TODAY!

DKB-12

Temecula, Old Town

Jan 16th, Saturday

12-2 p.m., approximately

Menu for both venue’s

Blue Cheese Stuffed Fried Olives with Roasted Red Pepper Dip

Tangerine, Beet & Avocado Salad

Braised Chicken Breast with White Wine Crème Fraîche Sauce
on a bed of Blanched Spinach with Bacon

Tomato Stuffed Raviolis

Meyer Lemon Cupcakes

 
10 – 20% off on all purchases the night of the class

For Seal Beach Reservations Call:
562-296-5421

For Temecula Reservations please call:
951-693-0607

Sponsored by

Leave a comment
Share
  • Pin it
  • Share
  • Tweet
  • Share
  • Email

New Year Empanadas

12 / 31 / 1512 / 31 / 15

ham and cheese empanadas

Another quick and easy appetizer from the pantry, the refrigerated pantry that is. Make ahead, freeze and cook as many as you like. I made these pastries using a 3″ cutter and fold them over to look like half moons. You can make them round, square, make them larger or smaller, whatever your needs might be.

Try and get puff pastry that is made with real butter for a better flavor and defrost it in the refrigerator. The trick to working with puff pastry is to keep it as cold as possible, if it becomes sticky, put it back in the refrigerator until it firms up. If you don’t have time to freeze the pastries before baking, let them rest and chill up in the refrigerator while your oven is preheating.

(If you’d like to try your hand at making Quick Puff Pastry at home try this recipe~it’s easy! Just start the day before)

Quick Puff Pastry Recipe

Make extra, these are tasty treats that will keep for up to 3 months in the freezer.

Happy New Year!

Smoked Ham and Gruyere Cheese Empanadas

Save
Print
  • 1 box puff pastry, defrosted or homemade
  • 1 tablespoon Dijon mustard, approximately
  • ¾ cup Manchego or gruyere cheese, grated
  • ¾ cup Serrano or Black Forest ham, chopped
  • 1 egg whisked with a little water

Preheat oven to 400°. Line two baking sheets with parchment paper and set aside.

Roll out dough* and using a round cutter, cut shapes in 3" rounds.

Spread with a small amount of mustard and sprinkle half the dough with ham and cheese leaving a 1/4" border around the edge of the dough. Brush the edge of the dough with water, fold over and crimp edges with a fork. It's best to freeze the empanadas and cook from a frozen state. Freeze individually on a baking sheet and then store in a freezer tight bag. If you don’t have time to freeze then bake, refrigerate them until they are very cold, about 1 hr.

Brush the egg/water mixture over top of the dough and bake for 15 min or until crust is lightly browned. If baking from a frozen state it may take 25 minutes to baking.

*Keep puff pastry as cold as possible, if dough begins to stick return to the refrigerator until cold and then continue with recipe.


Leave a comment
Share
  • Pin it
  • Share
  • Tweet
  • Share
  • Email

Chocolate-Peppermint Crunch Cookies

12 / 22 / 15

Chocolate-Peppermint Crinkle Cookies


Chocolate-Peppermint Crunch Cookies

Save
Print

Makes about 36 cookies

This is not an original recipe but I’m not exactly sure where or when I started making these delicious cookies. I apologize for not giving credit to the creator!

  • 1 1/2 cups all-purpose flour
  • 1/2 cup unsweetened cocoa powder
  • 2 teaspoons baking powder
  • ½ teaspoon salt
  • ¼ cup chopped walnut pieces, optional
  • ¼ cup crushed peppermint pieces, optional*
  • 8 tablespoons (1 stick) unsalted butter, softened
  • 1 cup packed light brown sugar
  • 2 large eggs
  • 8 ounces bittersweet chocolate, melted and cooled*
  • 1 teaspoon peppermint extract, or vanilla
  • 1/2 cup granulated sugar
  • 1 cup powdered sugar

In a medium bowl, whisk together the flour, cocoa powder, baking powder, and salt. Add the chopped walnuts and peppermint chips, stir to distribute well.

In the bowl of a stand mixer, fitted with the paddle attachment, or in a large mixing bowl, cream the butter and brown sugar until light and fluffy, about 3 minutes.

Add the eggs and vanilla, and beat until completely incorporated. Add the melted chocolate and beat until completely incorporated. Gradually fold in the flour mixture until just combined.

Chill the dough for at least 2 hours until firm, or up to overnight.

Remove the dough from the refrigerator. Preheat the oven to 350°F. Line a baking sheet with parchment paper or a silicone baking mat.

Place the granulated and powdered sugar in separate small bowls. Scoop 1 tablespoon of the dough, form into a ball, and place on a plate. Repeat with the remaining dough.

Roll each ball in granulated sugar and then in powdered sugar to coat. Place on the baking sheet 2 inches apart. Bake for 10 to 12 minutes, until the cookies begin to spread and the tops split. Remove from the oven and cool for a few minutes on the baking sheet, then transfer the cookies to wire cooling racks. Let the baking sheet cool, and repeat with the remaining dough.

Cookies will keep in an airtight container for about one week.

*To melt the chocolate, place in a microwave safe bowl and heat for 30 seconds, stir, and heat at 10 second intervals until melted, stir occasionally.

*To crush peppermint pieces, place several candy canes or peppermint candies into a freezer type bag and crush with a meat pounder or rolling pin.

Related Posts Plugin for WordPress, Blogger...
Leave a comment
Share
  • Pin it
  • Share
  • Tweet
  • Share
  • Email

Posts navigation

Previous Page 1 2 … 14 15 16 17 18 … 21 22 Next Page
Deb

Meet Chef Debbi

READ BIO

Join-Us Sign up for our newsletter to receive exclusive tips 'n tricks, and special offers on classes, tours, and more!

Recent Posts

  • New E-Book!
  • From the Pantry
  • Spaghettini at Home
  • Growing Corn
  • Spring IS Coming!

Categories

BookCUT

What's in Your Pantry?

How to stock your pantry to create delicious dishes.

Learn Chef Debbi's pantry essentials and how to substitute ingredients for pantry staples in her basic recipes for quick and easy meals.
BUY BOOK>

FacebookTwitterInstagramGooglepinterest


© 2014, DEB'S KITCHEN
Angie Makes Feminine WordPress Themes