Deb's Kitchen - Farm, Food, Wine & Lifestyle Adventures
  • Facebook
  • Google
  • Twitter
  • Instagram
  • Pinterest
  • Email
Menu
Skip to content
  • Home
  • Blog
  • Events
    • Classes
    • Tours & Adventures
  • Edible Gardening
  • Preserving
  • Recipes
    • Appetizers
    • Soups and Salads
    • Main Dishes
    • Side Dishes
    • Desserts
  • About
    • Whats In Your Pantry
    • Ask Debbi
    • Deb’s Kitchen Botanicals
    • Press
  • Contact

Category Archives: Recipes

Christmas Roast

12 / 6 / 16

A Christmas Roast, Dec. 2016
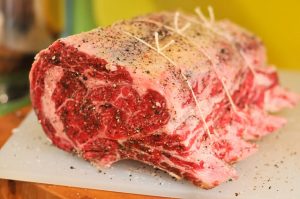
rib-roast

After the huge cooking spree for Thanksgiving I’m happy to create a simple elegant meal for Christmas and I always turn to a rib roast. Most people refer to them as a ‘prime rib’ yet that really refers to the grade of meat. While USDA Prime Grade is the best, it can also be on the expensive side, while a good ‘Choice’ grade is nearly as good as the prime, it can be purchased for much less. Both roasts are considered ‘standing rib roast’ and you treat them equally in cooking.

Costco has the absolute best deal on both Choice and Prime Grade roasts, choose bone in for the best flavor and juiciness. Either roast will need to cook a little longer with the bone in but the flavor is superior. A trick you can do is cut the bones off the roast and tie them back onto the roast, you’ll still get juicy flavor but won’t need to roast quite as long.

The roast will take some time to come to room temperature so remove from the refrigerator 3 house before roasting. Pre heat your oven for 30 minutes and roast for approximately 15 – 20 minutes per pound, start with a high heat, 450°, for 15 minutes, then turn the oven down to 325° and continue cooking. Use a digital probe thermometer for best results, it’s worth spending $15 or $20 on a digital thermometer for a $75.00 roast.

For rare roast remove from the oven when the thermometer reaches 120°, for medium rare, 125° or 130° for medium, the meat will continue to cook (called carry over cooking time) while it rests. I like to serve the roast with a Red Wine Sauce or Bordelaise Sauce but remember that your sauce will only be as good as the beef stock you use so use the best. Homemade is tops but if you must purchase a stock try More Than Gourmet Glace de Veau (veal stock). Standing rib roasts are great on the grill also but that’s another story.


Photo: Josh, The Meatwave

Prime Rib or Standing Rib Roast

Save
Print

Serves 8
Total preparation time: 1 hr. 30 min. – 2 hr.

  • 1 (7 lb.) Rib Roast, Bone-In or Boned & Tied
  • 2 tablespoons unsalted butter
  • 1 clove garlic, minced – optional use 1 teaspoon ground garlic (NOT garlic salt)
  • Sea Salt and ground pepper

Place roast in a shallow baking pan bone down, melt butter in small saucepan and add garlic and salt and pepper. Mix well, brush over roast, and let stand at room temperature for 2 hours.

Preheat oven to 450°F. Use a probe meat thermometer*, placed into the center of the roast but not touching bone. Roast for 10 minutes in uncovered pan, then reduce heat to 350°F and continue for 1 hour and 20 minutes for rare. Baste with pan drippings from time to time. Thermometer should read 120° - 125° for rare, 130° - 135° for medium rare. Do not cook beyond 140°, medium. Let the roast stand for 15 minutes, with the probe in the meat, before slicing. Slice either between the bones or cut off all the bones at once and the slice the meat into serving pieces.

Roast 15 minutes more if you want a medium roast, another 15 minutes for well done.

Remove from oven when done, and allow the meat to rest for a few minutes before carving. Transfer to a warmed serving platter.

• A digital probe meat thermometer – the probe remains in the meat while in the oven and the control sits outside on the stove or counter. See link below

Bordelaise Sauce

Save
Print
  • 3 tablespoons butter
  • 1 onion, chopped
  • 2 carrots, sliced in rounds
  • 2 cloves garlic, cut in half
  • 4 peppercorns
  • 1 bay leaf
  • 11/4 cups beef broth*
  • 1 sprig thyme
  • Sea Salt
  • 2 tablespoons flour
  • 1/2 cup dry red wine
  • 1 tablespoon Italian flat leaf parsley, chopped

Melt the butter in a heavy skillet and sauté the onion until transparent. Add the carrots and cook until soft.

Place garlic, peppercorns, and bay leaf in cheesecloth bag. Add to pan along with 1 cup of beef broth. Boil until broth has been slightly reduced, about 10 minutes, then season with thyme and salt.

Remove cheesecloth bag and put mixture through a coarse strainer. Return to pan.

Meanwhile, dissolve flour in the other 1/4 cup of broth and add gradually to sauce. Stir constantly until sauce thickens, then add the wine. Reduce heat and allow to simmer until ready to serve, and then sprinkle chopped parsley on top.

Use a quality beef broth if not making your own such as More Than Gourmet Glace de Veau (veal stock).

Leave a comment
Share
  • Pin it
  • Share
  • Tweet
  • Share
  • Email

Chicken Piccata

11 / 7 / 16

An easy weeknight recipe, especially if you make the actual chicken cutlets ahead of time and freeze. Take them out of the freezer and place in the refrigerator before you head out for the day. When you’re ready for dinner (or lunch) you can finish the dish in less than 15 minutes, cover some pasta in a microwave dish and cook while the chicken cooks, add a little salad with some freshly grated parmesan cheese and seasonal vegetables for a quick, healthy tasty meal!

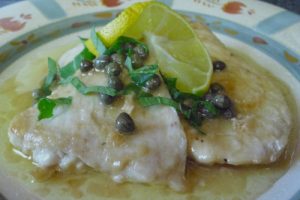
chicken-piccata

Chicken Piccata

Save
Print

Serves 4

  • 2 skinless, boneless chicken breasts, (1 whole breast) cut in half (through the middle, as if butterflying)
  • Sea salt and freshly ground black pepper
  • All-purpose flour, for dredging
  • 6 tablespoons unsalted butter
  • 5 tablespoons extra-virgin olive oil
  • 1/3 cup fresh lemon juice
  • 1/2 cup chicken stock
  • 1/4 cup brined capers, rinsed
  • 1/3 cup Italian parsley, chopped

Place chicken into a freezer type bag and pound with a flat meat tenderizer to about 1/4" thick. Season chicken with salt and pepper. Dredge chicken in flour and shake off excess.

In a large skillet over medium high heat, melt 2 tablespoons of butter with 3 tablespoons olive oil. When butter has melted, add chicken without crowding, you'll probably need to do this in two batches, and cook until lightly browned. Turn and lightly brown the other side, transfer to plate.

Add more butter and oil, as needed, if you are sautéing in two batches.

Add the lemon juice, stock and capers to the hot pan and bring to boil, scraping up brown bits from the pan, the 'fond'. Taste and season, if necessary. Return all the chicken to the pan, including any liquid that has gathered on the plate, and simmer for 5 minutes. Remove chicken to platter. Add remaining 2 tablespoons butter to sauce and whisk vigorously. Pour sauce over chicken and garnish with parsley.

www.debskitchen.com

[email protected]

Leave a comment
Share
  • Pin it
  • Share
  • Tweet
  • Share
  • Email

10 must have pantry items for the holidays

11 / 4 / 1611 / 4 / 16

10 must have pantry items for the holidays

herbsspices-411nutrition

Basic Pantry

  1. Organic Chicken Stock
  2. Unsalted butter and a variety of oils (Olive Oil, Peanut, Vegetable & Grapeseed)
  3. Organic Large Eggs
  4. Organic Milk and Cream (for whipping and cooking)
  5. Variety of cheeses, for cooking and serving as appetizers or dessert
  6. Variety of potatoes, Russet for baked or mashed, Fingerlings or Yukon Gold for roasting
  7. Day old breads for breadcrumbs and stuffing or dressing. Freeze for later use. Crackers
  8. Celery, Carrots and Onions, Fresh Citrus
  9. Fresh Sage, Italian Parsley and other herbs
  10. Fresh and Dried Mushrooms

Book Cover

Buy my book ‘What’s In Your Pantry’ for more tips & tricks in the kitchen!


Baking

Beyond the basics, flour, white, brown and powdered sugars, baking soda, baking powder and vanilla.

  1. Nuts
  2. Chocolate
  3. Cocoa Powder
  4. Cinnamon or Baking Spice, Allspice, Nutmeg
  5. Dried Fruits
  6. Variety of jam for easy to make desserts
  7. Peppermint and dried fruit candies
  8. Cream of tartar
  9. Parchment paper
  10. Caramels and Toffee

Make Ahead for the Freezer

  1. Pie Dough
  2. Cookie Dough
  3. Puff Pastry (buy an all butter pastry-read the label)
  4. Gravy
  5. Easy bake appetizers, Empanadas, Pot Stickers, Crab Cakes, Cheese Balls
  6. Meatballs, basic recipe use different sauces for quick appetizers
  7. Quickbreads
  8. Casseroles
  9. Breakfast Treats, Cinnamon Rolls, Scones,
  10. Frozen Seafood, Shrimp, Scallops, Lobster
Leave a comment
Share
  • Pin it
  • Share
  • Tweet
  • Share
  • Email

Chocolate Cherry Cookies

9 / 16 / 16

In honor of my friends birthday I made him these cookies and I had some leftover (this recipe makes about 4 dozen cookies). I took them to last nights cooking class and everybody seemed to love them. They’re not too sweet but just the right size for a nice little bite and they pair well with any red wine (what doesn’t?).

During the holidays I replace the cherries with crushed peppermint candies and add peppermint extract instead of the vanilla. So I hope you enjoy them!

chocolate-peppermint-crinkle-cookies

Chocolate Cherry Cookies

Save
Print
  • 1 1/2 cups all-purpose flour
  • 1/2 cup unsweetened cocoa powder
  • 2 teaspoons baking powder
  • ½ teaspoon salt
  • ¼ cup chopped walnut pieces, optional
  • 1/2 cup chopped dried cherries
  • 8 tablespoons (1 stick) unsalted butter, softened
  • 1 cup packed light brown sugar
  • 2 large eggs
  • 8 ounces bittersweet chocolate, melted and cooled*
  • 1 teaspoon vanilla extract
  • 1/2 cup granulated sugar
  • 1 cup powdered sugar

In a medium bowl, whisk together the flour, cocoa powder, baking powder, and salt. Add the chopped walnuts and peppermint chips, stir to distribute well.

In the bowl of a stand mixer, fitted with the paddle attachment, or in a large mixing bowl, cream the butter and brown sugar until light and fluffy, about 3 minutes.

Add the eggs and vanilla, and beat until completely incorporated. Add the melted chocolate and beat until completely incorporated. Gradually fold in the flour mixture until just combined.

Chill the dough for at least 2 hours until firm, or up to overnight.

Remove the dough from the refrigerator. Preheat the oven to 350°F. Line a baking sheet with parchment paper or a silicone baking mat.

Place the granulated and powdered sugar in separate small bowls. Scoop 1 tablespoon of the dough, form into a ball, and place on a plate. Repeat with the remaining dough.

Roll each ball in granulated sugar and then in powdered sugar to coat. Place on the baking sheet 2 inches apart. Bake for 10 to 12 minutes, until the cookies begin to spread and the tops split. Remove from the oven and cool for a few minutes on the baking sheet, then transfer the cookies to wire cooling racks. Let the baking sheet cool, and repeat with the remaining dough.

Cookies will keep in an airtight container for about one week.

*To melt the chocolate, place in a microwave safe bowl and heat for 30 seconds, stir, and heat at 10 second intervals until melted, stir occasionally.

Optional:

For Peppermint Cookies add 1/4 cup crushed peppermint candies and use peppermint extract instead of the vanilla.

*To crush peppermint pieces, place several candy canes or peppermint candies into a freezer type bag and crush with a meat pounder or rolling pin.

Leave a comment
Share
  • Pin it
  • Share
  • Tweet
  • Share
  • Email

Santa Maria Style BBQ

9 / 2 / 16

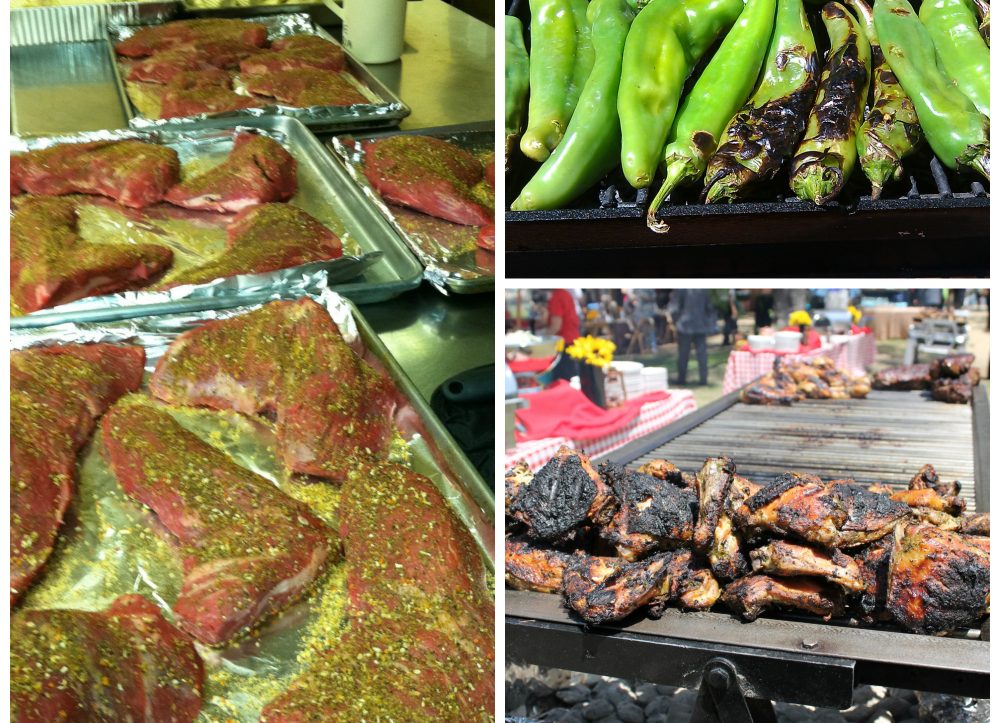
Santa Maria style bbq tri tip is traditionally made with a simple rub and grilled over hard wood, sliced thin and served with salsa, pinquinto beans and tortillas. You can find bbq’s on most street corners in Santa Maria but if you can’t get there, grill up your own. I prefer a wet marinade for a little extra flavor and sometimes I’d rather cook it in the oven so I’ve offered a recipe for both. Be sure to let it rest after grilling and slice it thin against the grain. Make extra for sandwiches or tacos or heating leftovers up to serve with some nice fried eggs. You’ll want to make sure you have enough so plan on 1/2 # per person.


tri tip, hatch chile collage

Santa Maria Style Tri Tip

Save
Print
  • 1/2 cup red wine
  • 1/2 cup olive oil
  • 2 tablespoons Worcestershire
  • 1 tablespoon soy sauce
  • 1 lemon, juiced
  • 3 cloves garlic, minced
  • 1/4 teaspoon dry mustard
  • 1 tri tip, about 2 1/2 – 3 pounds

Combine red wine, oil, Worcestershire, soy, lemon juice, garlic and mustard.

Marinate meat in sauce in refrigerator for up to 2 hours, turning several times.

Grilling Method

Remove from refrigerator 2 hours before grilling. Grill over medium heat about 15 to 20 minutes on each side, brushing frequently with marinade. For a more accurate temperature use a probe style thermometer that has been designed to be used with a grill. Use the temperature guides below for cooking.

Oven Method

Preheat the oven to 450°. Remove the meat from the marinade and pat it dry. Discard the marinade.

Place the tri-tip, fat side up, on a rack in a shallow roasting pan. Use a probe style thermometer inserted into the center of the meat. Set temperature for 115° - 120° for rare, 120° - 125° for medium-rare or 130° for medium, it is not recommended to cook tri tip higher than 130°, the meat will be tough and dry.

Transfer the meat to a carving board or platter, cover loosely with foil, and let it rest for 10 to 15 minutes before carving to allow the residual heat to complete the cooking and the juices to stabilize.

Slice the meat into thin slices across the grain.

Santa Maria Pinquinto Beans

Save
Print
  • 1 pound Rancho Gordo dried heirloom Santa Maria pinquito beans
  • 10 cups water, divided
  • 3 tablespoons olive oil, divided
  • 1 carrot, peeled
  • ½ onion, chopped
  • 1 celery stalk
  • 3 teaspoons kosher salt, divided
  • 2 slices bacon, diced
  • 1 large red onion, chopped
  • 3 cloves garlic, minced
  • 6 ounces tomato purée
  • 2 tablespoons brown sugar
  • 2 teaspoons ground dry mustard
  • 1 teaspoon Tabasco sauce, optional

Pick through the beans and remove any foreign matter. Rinse with cold water. Place the beans in a large bowl, cover with 6 cups of water and refrigerate overnight.

Drain the beans and rinse. Place the beans in a pot with 4 cups of water, 1 tablespoon olive oil, carrot, onion and celery. Bring to a boil and then reduce to a simmer. Cover and cook for 1 hour or until the beans are tender.

Season with 1 teaspoon kosher salt, then allow the beans to cool in the liquid. Once cool, remove and discard the carrot, onion and celery.

In a large pot set over medium heat, add bacon and remaining olive oil. Cook until bacon is golden brown. Add the red onion and cook for 5 minutes, stirring occasionally. Add the garlic and cook for 2 minutes more. Add the tomato purée, brown sugar, dry mustard and Tabasco sauce. Next, add the reserved beans, 2 cups of the bean-cooking liquid, 2 teaspoons kosher salt and cook for 30 minutes at a low simmer. The beans can be refrigerated for up to one week, or freeze for up to 3 months.

Courtesy of Cambria Winery

Rancho Gordo Beans can be purchased from www.ranchogordo.com

Santa Maria Style Salsa

Save
Print
  • 3 medium fresh tomatoes, chopped
  • ½ cup finely chopped celery
  • ½ cup chopped green onions
  • ½ cup finely chopped California green chiles
  • 2 tablespoons snipped cilantro
  • 1 teaspoon vinegar
  • Dash of Worcestershire sauce
  • Pinch of garlic salt
  • Pinch of dried oregano, crushed
  • Few drops of hot pepper sauce

Combine all ingredients in a bowl, cover and let stand for one hour to blend flavors.


Leave a comment
Share
  • Pin it
  • Share
  • Tweet
  • Share
  • Email

It’s Hatch Chile Time!

8 / 15 / 16


IMAG0020

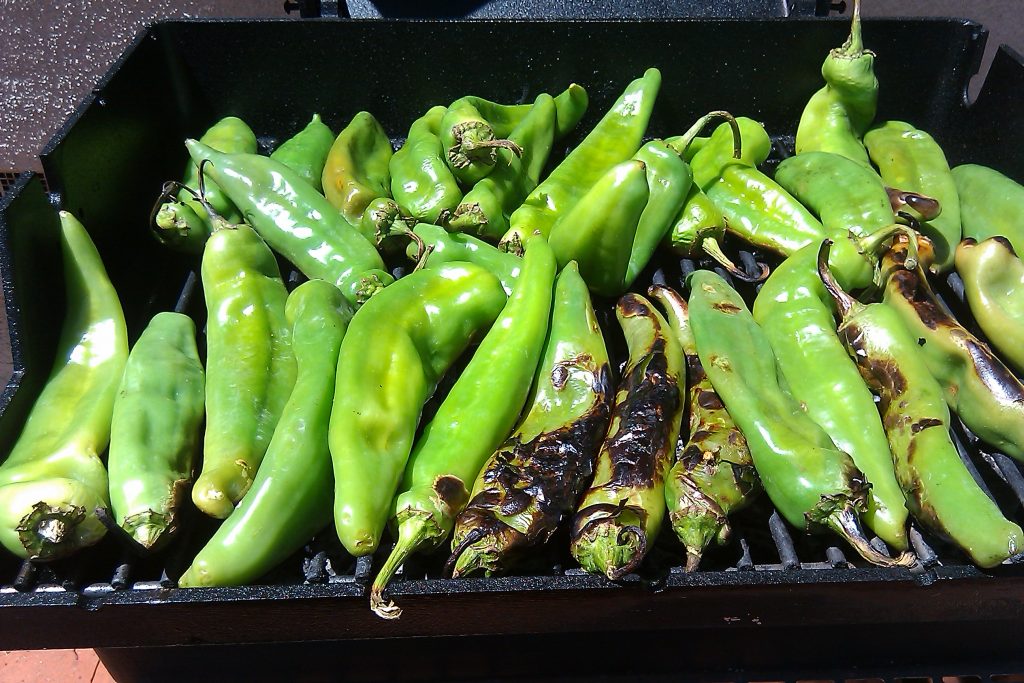
Get out your BBQ’s or roasters, it’s time for Hatch Chile’s! You’ll want to stock up on these fabulous, versatile chiles while they are in season. Melissa’s Produce brings these chiles from Hatch, New Mexico to Southern California and hosts roastings all over the southland (actually all over the US). You could order raw ones from Melissa’s website, melissas.com , or you could pop into a roasting (check out roasting dates, times & stores here) and they will roast them up for you on-site. Inside the store you’ll find all kinds of Hatch chile treats as well as things to cook up like Hatch Salmon Burgers or Hatch Chile Crab Cakes and Hatch chile sausage. Baked goods, cheese with Hatch chile’s, salsa and sauces. The list is endless!

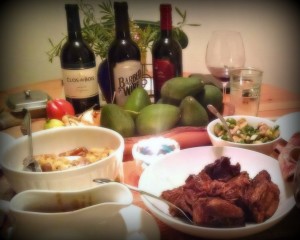
Here is a perfect chicken wing recipe for football season, we grilled it up for the LA Rams first pre-season football game last weekend.

Tangerine Hatch Chile Chicken Wings and Cucumber-Yogurt Sauce

Save
Print

Serve the wings with the Cucumber-Yogurt Sauce and sliced veggies and LOTS of napkins.

  • 3 small Persian cucumbers or large English cucumber, diced
  • 1 tablespoon salt
  • 2 cups Greek yogurt*
  • 1 tablespoon lemon juice
  • 1 garlic clove, minced
  • 1 tablespoon fresh dill
  • 1 tablespoon olive oil
  • Salt & freshly ground black pepper, to taste
  • 1 package chicken wings
  • 1 bottle of Not Ketchup Sugar Free Tangerine Hatch Chile Sauce*

Toss a bunch of chicken wings with Tangerine Hatch Chile Sauce and grill over hot coals until the chicken wings are blackened and tender.

Cucumber Yogurt Sauce

Peel cucumbers and dice, if using English cucumber you can remove the seeds. Put them in a colander and sprinkle with the tablespoon of salt to draw out some of the water, let drain for about 30 min. Place the cucumbers into a piece of cheesecloth or kitchen towel and twist the towel to get out any remaining liquid.

Add everything to the food processor and blend until you get the consistency you want (chunky or creamy). Season with salt and pepper and refrigerate before serving, best if made a few hours before you’re going to serve it.

*If the yogurt is a little runny you can drain it through cheesecloth for several hours or overnight.

tnagerine hatch chile sauce

*You can find the Sugar-Free Tangerine Hatch Chile ‘Not Ketchup’ here

Leave a comment
Share
  • Pin it
  • Share
  • Tweet
  • Share
  • Email

Slow Cooker Carnitas

6 / 14 / 16

For everyone who missed this recipe from class, I thought I’d put it up on the blog for you! A great recipe for easy summer dishes!

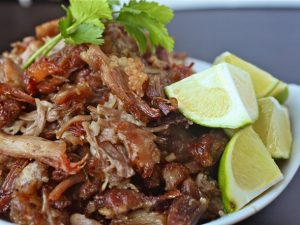
carnitas

Save
Print

Adapted slightly from Rick Bayless

  • 2 pounds boneless pork shoulder
  • Salt
  • 1 ½ - 2 cups freshly rendered pork lard (you can buy good-quality lard from a local butcher or Mexican market; I don't recommend the hydrogenated lard that's sold in bricks)

Cut the pork into 2 ½- to 3-inch pieces and sprinkle generously on all sides with salt. Scoop the lard into a 6-quart slow cooker and turn on high. When the lard is melted, fit in the pork in a single layer (there should be few gaps between the pieces and they should be barely covered with the fat). Cover and cook until thoroughly tender, about 3 hours. Turn off, uncover and let cool.

Remove the pork to a cutting board, leaving behind as much fat as possible. (You can refrigerate the lard to use for another round of carnitas, to season beans or fry potatoes or the like.) Shred the carnitas into very large, coarse pieces. Set a heavy skillet over medium heat. When the pan is very hot, spoon in enough carnitas-cooking fat to film the bottom generously. Scoop in the pork, spreading it out evenly over the bottom of the pan. Cook undisturbed for a couple of minutes, until it is richly browned and releases itself from the bottom of the pan. Gently turn the pieces to brown the other side. Remove to a plate lined with paper towels. Sprinkle with salt (coarse salt is welcome here, if you have it).

2 Comments
Share
  • Pin it
  • Share
  • Tweet
  • Share
  • Email

Strawberry Brownie Bites

2 / 23 / 16

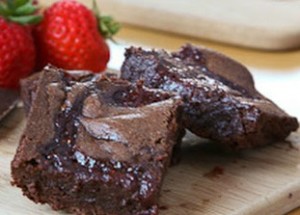
This is a recipe that we prepared in our Feb. classes and I’ve updated the brownie recipe to a new one that I really prefer. The recipe is from King Arthur Flour Co. If you’ve never been to their website, you should really treat yourself! Enjoy!

strawberries & brownies debskitchen

Save
Print
  • 1 cup unsalted butter
  • 2 1/4 cups sugar
  • 1 1/4 cups Double-Dutch Dark Cocoa or Dutch-process cocoa
  • 1 tablespoon espresso powder
  • 1 teaspoon salt
  • 1 teaspoon baking powder
  • 1 tablespoon vanilla extract
  • 4 large eggs
  • 1 1/2 cups King Arthur Unbleached All-Purpose Flour
  • 2 cups chocolate chips
  • 1 cup chopped nuts, optional
  • Cheesecake filling
  • 12 oz. cream cheese, room temperature
  • ¼ - ½ cups powdered sugar
  • ¼ cup strawberry jam
  • 1 pint strawberries, halved

Preheat the oven to 350°F. Lightly grease a 10" x 15" jelly roll pan or a 9" x 13" pan. For guaranteed easy removal of the brownies, line the greased pan with parchment, and grease the parchment.

In a saucepan set over low heat, melt the butter. Add the sugar, stirring to combine. Remove from heat.

Stir in the cocoa, espresso powder, salt, baking powder, and vanilla.

Whisk in the eggs, stirring until smooth.

Add the flour, chips, and optional nuts, again stirring until smooth.

Spoon the batter into the prepared pan.

Bake the brownies for 28 to 34 minutes, until a cake tester inserted into the center comes out clean. The brownies should feel set on the edges, and barely set in the center.

Remove the brownies from the oven, and cool for at least 1 hour before cutting.

Use a 1 1/2" round cutter to cut as many circles as possible (about 46) out of the brownies in a 10" x 15" pan. You'll get about 38 from a 9" x 13" pan. Wrap well; enjoy the leftover scraps.

Filling

Combine the cream cheese, powdered sugar and strawberry puree until smooth.

Once the brownies have cooled, pipe the cheesecake filling into the center and top with the strawberry. Top with the halved strawberries, serve immediately. For a great topping marinated the strawberries in some quality balsamic vinegar for about ½ hour!

Store all ingredients separately if serving at a later time.

Adapted from King Arthur Flour

Leave a comment
Share
  • Pin it
  • Share
  • Tweet
  • Share
  • Email

Quick Puff Pastry

12 / 31 / 15

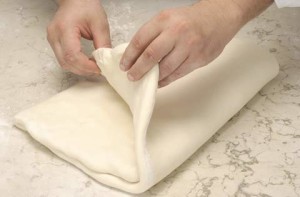
puff pastry fold

Use this delicious puff pastry to make these quick and easy

Smoky Ham & Gruyere Cheese Empanadas. 

ham and cheese empanadas

Save
Print

I learned this recipe from Nick Malgieri, it takes about 15 minutes to make once you learn the technique. Keep it in your freezer for easy access to sweet and savory dishes.

  • 1 1/4 stick of cold unsalted butter
  • 1/4 cup ice water
  • 1/2 teaspoons salt
  • 1 cup flour*

Cut 1 stick of butter into ½ - to ¼ “ dices, place on a plate and refrigerate.

Measure the water and stir in the salt to dissolve. Set aside.

Coarsely dice the remaining ¼ stick of butter. Place the flour in the work bowl of a food processor fitted with a metal blade. Add the ¼ stick of butter and pulse until the butter is absorbed—about ten to twelve 1-second pulses.

Add the chilled butter and pulse once or twice to distribute. Add water and salt mixture and pulse repeatedly, until the dough forms a rough ball—do not over process. (I have found with this method the dough doesn’t form much of a ball, do not add extra water, just continue with the recipe and it will come together easily).

Invert the mixture onto a floured work surface or rolpat. Remove the blade and press the dough into a rough rectangle.

Flour the dough and press (don’t roll) it with a rolling pin to flatten. Move the dough, making sure there is still flour under it to prevent it from sticking, and give the dough a 90° turn. Press again.

Again making sure that the surface and the dough are adequately floured, roll the dough until it forms a rectangle about 15 x 24”.

Fold the top long edge over the middle section, and then fold the bottom edge over that to make 3 equal layers. Roll the dough up like a jelly roll from one of the short edges. Use the palm of your hand to flatter the dough into a rectangular shape, about 6 x 10” and about 1” thick.

Refrigerate for at least 1 hour before using or the dough can be stored in the refrigerator up to 2 or 3 days or freeze up to 3 months.

*4 - 1/4 ounces if using King Arthur Flour, which I prefer, or use the scoop & sweep method.

Leave a comment
Share
  • Pin it
  • Share
  • Tweet
  • Share
  • Email

Braised Short Ribs

12 / 1 / 1512 / 1 / 15

short ribs-debskitchen


Easy Braised Short Ribs

Save
Print

Braising a tough cut of meat over a long period of time makes the meat deep, rich and delicious. With a small amount of preparation and a long cooking time these are easy to make and warms you up on those cold winter days. Make extra! You’ll want them for leftovers, you can make a ragu out of them, a pot pie or even a Shepherds pie for quick weeknight dinners. You’ll get more flavor out of the short ribs if they are on the bone, they will fall right off the bone after their long slow cooking so they’ll be easy to remove.

Serves 4

  • Olive oil
  • 1/3 cup flour (or more as needed)
  • 2 teaspoons sea salt
  • 1 teaspoon ground pepper
  • 4 pounds short ribs on the bone
  • 1 brown onion, chopped
  • 1 medium carrot, roughly chopped
  • 2 stalks celery, roughly chopped
  • 1 tablespoon tomato paste (double concentrate from a tube-found in the ‘Italian’ section
  • 2 tablespoons flour
  • ¼ cup dry red wine
  • 1 qt. beef stock, may use chicken stock
  • 1 bouquet garni (1 bay leaf, 1 sprig thyme, 2 sprigs Italian parsley tied together in cheesecloth

Heat oven to 350°.

Mix flour, salt and pepper together in a shallow bowl or on a plate.

Heat a large Dutch oven over medium high heat; add enough oil to coat the bottom of the pan.

Dry short ribs well and dredge in the flour mixture, shake off the excess and place the meaty side into the hot oil. Do not crowd the meat in the pan or it will not brown properly. This is the most important step in braising so take your time. Remove the ribs, set aside and continue until all ribs are browned.

In the same pan, add more oil as necessary, add onions, carrots, celery to the pan and sauté until lightly browned.

Add tomato paste and stir to coat all the vegetables and cook the paste a little, about 2 minutes.

Add flour and stirring constantly cook for another 5 minutes without burning. The flour may turn a little dark but that’s fine.

Add the dry red wine to the pan and scrape the bits that have stuck to the bottom of the pan. Let reduce and thicken slightly. Remove from the heat.

Return the ribs to the pan, cover with stock and add the bouquet garni. Put the lid on the Dutch oven and bake for 3 hours. Remove bouquet garni.

Juices may be thickened into gravy with a beurre maníe, roux or cornstarch slurry.

Beurre Manie, Roux, Cornstarch Slurry

Save
Print

Beurre Manie

Mix together equal parts softened butter and flour until it looks like thick butter and all the flour is incorporated.

Roux

Melt 2 Tb. butter in a pan, add 2 Tb. flour, whisk together and cook until lightly browned

Cornstarch Slurry

2 parts cold water mixed with 1 part cornstarch

Whisk any of these into your hot liquid, stirring until thickened. Don't over-cook the cornstarch slurry or it will start to break down and become thin again.

Leave a comment
Share
  • Pin it
  • Share
  • Tweet
  • Share
  • Email

Chestnut-Apple Dressing

11 / 24 / 1511 / 24 / 15

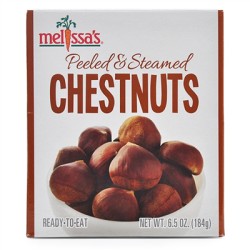
Love the taste of chestnuts in your dressing? It’s easy with Peeled & Steamed Chestnuts! I find them at Gelsons, Bristol Farms, Lazy Acres or you can order them direct from Melissas. Here’s my favorite recipe…

chestnuts

Chestnut-Apple Dressing

Save
Print
  • 1 loaf artisan bread -- cut into cubes, toasted until lightly browned
  • 1 box cornbread mix -- baked and cut into pieces (Trader Joes has an excellent brand)
  • 1 onion -- diced
  • 4 ribs celery -- diced
  • 3 tablespoons minced fresh sage leaves
  • 2 tablespoons minced fresh thyme leaves
  • 1 stick unsalted butter -- (1/2 cup)
  • 1 pound fresh chestnuts -- shelled and peeled, chopped coarse, or 1pkg. vacuum-packed whole chestnuts, chopped
  • 2 small apples (organic) -- golden delicious, cut into 1" pieces with skin
  • 1/2 cup finely chopped fresh parsley leaves
  • 1 egg -- lightly beaten
  • 1 cup turkey stock -- or chicken stock, as needed

Fresh chestnuts in shell:

With a sharp knife cut an X on the round side of each chestnut. Spread the chestnuts in one layer on a baking sheet and bake the chestnuts in a preheated 450 oven for 10 minutes, or until the shells open. Remove the chestnuts, a handful at a time, and shell and peel them while they are still hot.

Preheat the oven to 350°

For dressing:

In a large pan, sauté the onions, celery, sage, thyme in the butter over moderately low heat, stirring, until the vegetables are softened, add apples and the chestnuts, and cook the mixture, stirring, for 1 minute. Add the vegetable mixture to the bread pieces, tossing the mixture well, stir in the parsley and salt and pepper to taste, and let the stuffing cool completely. Add the egg and enough of the stock to just bring the dressing together.

Bake for 20 minutes covered; uncover and continue baking 15 minutes or until lightly toasted on top.

Leave a comment
Share
  • Pin it
  • Share
  • Tweet
  • Share
  • Email

Perfectly Flaky Piecrust

11 / 17 / 15

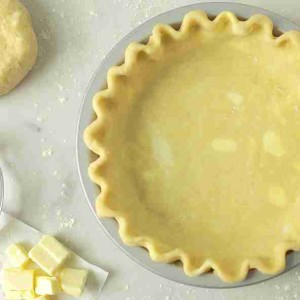
pie-crust-guide

Perfectly Flaky Pie Crust

Save
Print

Makes 2 – crusts

Adapted from ‘What’s In Your Pantry’ by Debbi Dubbs

  • 2 1/2 cups (10 ½ oz.) all-purpose flour, I prefer King Arthur Flour
  • 1 1/4 teaspoons salt
  • 6 tablespoons unsalted butter, chilled and cubed
  • 1/2 cup vegetable shortening, chilled
  • 6-8 tablespoons ice water, depending on texture of dough
  • To add a little sweetness, add 1 teaspoon of sugar;
  • for a savory dough 1 teaspoon finely chopped herbs

Refrigerate all ingredients before beginning

Add flour and salt into the bowl of a food processor; pulse a few times to incorporate all the ingredients. Add sugar or herbs here as well.

Add the cold butter and process until the mixture is crumbly and the butter is pea size.

Place the mixture into a wide bowl and add water 1 tablespoon at a time until the mixture comes together. Don’t overwork the dough or it will be tough, not flaky. Once the dough begins to form large clumps use floured hands to bring it together into a ball and then press into a disc; divide the dough into two pieces. You’ll need more dough for the bottom crust so make one disc using 2/3 of the dough and one disc using 1/3 of the dough; wrap in plastic wrap and refrigerate for at least 1 hour or several up to one day.

Dough can be wrapped well at this point and frozen for up to three months. Let the dough defrost overnight in the refrigerator before using.

Lightly grease your pie pan to help ease out that first piece. Gently roll the larger chilled disk out on a floured counter or rolling mat, lifting and moving the dough every few rolls to help prevent sticking. Add only enough flour to the counter to keep the dough from sticking.

Place your pan on top of the dough to make sure it is the correct size; it should be slightly larger than the pan, approximately 13”. Fold the dough in half and then in half again, pick it up and lay it in the pie pan. Unfold and gently lay the dough into the pan without stretching the dough. Never pull the dough to stretch it and lightly press it into the pan.

Cover and refrigerate for 30 minutes. Preheat your oven to 400°.

To blind bake:

Blind baking is baking the dough without filling.

Prick the bottom and sides of the dough; cut a piece of foil large enough to cover the bottom and sides of the dough, butter the dull side and lay the buttered side on the bottom of the dough and press into the sides. Line with pie weights or dried beans and bake in the center of the oven for 10 minutes, remove the weights and foil and continue baking for another 10 minutes or until lightly browned. Let cool before filling.

Continue with any pie recipe.

Related Posts Plugin for WordPress, Blogger...
2 Comments
Share
  • Pin it
  • Share
  • Tweet
  • Share
  • Email

Posts navigation

Previous Page 1 2 3 4 5 6 7 Next Page
Deb

Meet Chef Debbi

READ BIO

Join-Us Sign up for our newsletter to receive exclusive tips 'n tricks, and special offers on classes, tours, and more!

Recent Posts

  • New E-Book!
  • From the Pantry
  • Spaghettini at Home
  • Growing Corn
  • Spring IS Coming!

Categories

BookCUT

What's in Your Pantry?

How to stock your pantry to create delicious dishes.

Learn Chef Debbi's pantry essentials and how to substitute ingredients for pantry staples in her basic recipes for quick and easy meals.
BUY BOOK>

FacebookTwitterInstagramGooglepinterest


© 2014, DEB'S KITCHEN
Angie Makes Feminine WordPress Themes